Infosheets
08. Vine Teepee Installation
Vine teepees create amazing opportunities for learning and outdoor play. Vine teepees can be constructed of 1/2-inch rebar, 1/2-inch steel bar, or sturdy giant bamboo as described here.
- Determine location
For vines to grow vigorously on the teepee, choose a well-lit site with well-draining soil. To create a space that 2-4 children can inhabit, the teepee should be approximately 8 feet across and 8 feet tall inside. - Using pruning shears, remove leaf shoots flush to the poles.
To prevent water from entering and causing deterioration, a node should be left at the top of the narrow end of each pole to seal the end (Figure A). - Harvest bamboo poles
Locate a stand of large bamboo. Cut the bamboo to length. For a teepee 8 feet in diameter, 10 ft. lengths of bamboo are ideal. A hacksaw works best for cutting bamboo. Using pruning shears, remove leaf shoots flush to the poles. To prevent water from entering and causing deterioration, a node should be left at the top of the narrow end of each pole to seal the end (Figure A). - Mark center and radius of teepee (eight-sided)
Use a survey stake or flag to mark the center point of the teepee. Use a measuring tape and surveyors spray paint (or flags) to mark the radius of the teepee. - Mark locations of poles
Mark locations of poles in the sequence shown in Figure B, following steps 5-9. Locate the teepee entrance Determine where children will enter the teepee and position the layout of the poles on that location (Figure. C). The entrance should be 24-30 inches wide (Figure B). - Locate the teepee entrance
Determine where children will enter the teepee and position the layout of the poles on that location (Figure C). The entrance should be 24-30 inches wide (Figure B). - Mark the location of first pole
After locating the entrance, position the first pole on one side of the entrance. - Mark location of second pole
Position second pole opposite the first pole. Using an 8 ft length of jute twine, trace a straight line from the first pole through the center of the circle to locate the second pole (Figure D). Mark intersection of the circle on the opposite side. - Mark third and fourth pole locations
Run twine through the center at a 90 degree angle to the line of poles 1 and 2. Intersections with the circle define locations of poles 3 and 4. - Mark remaining pole locations
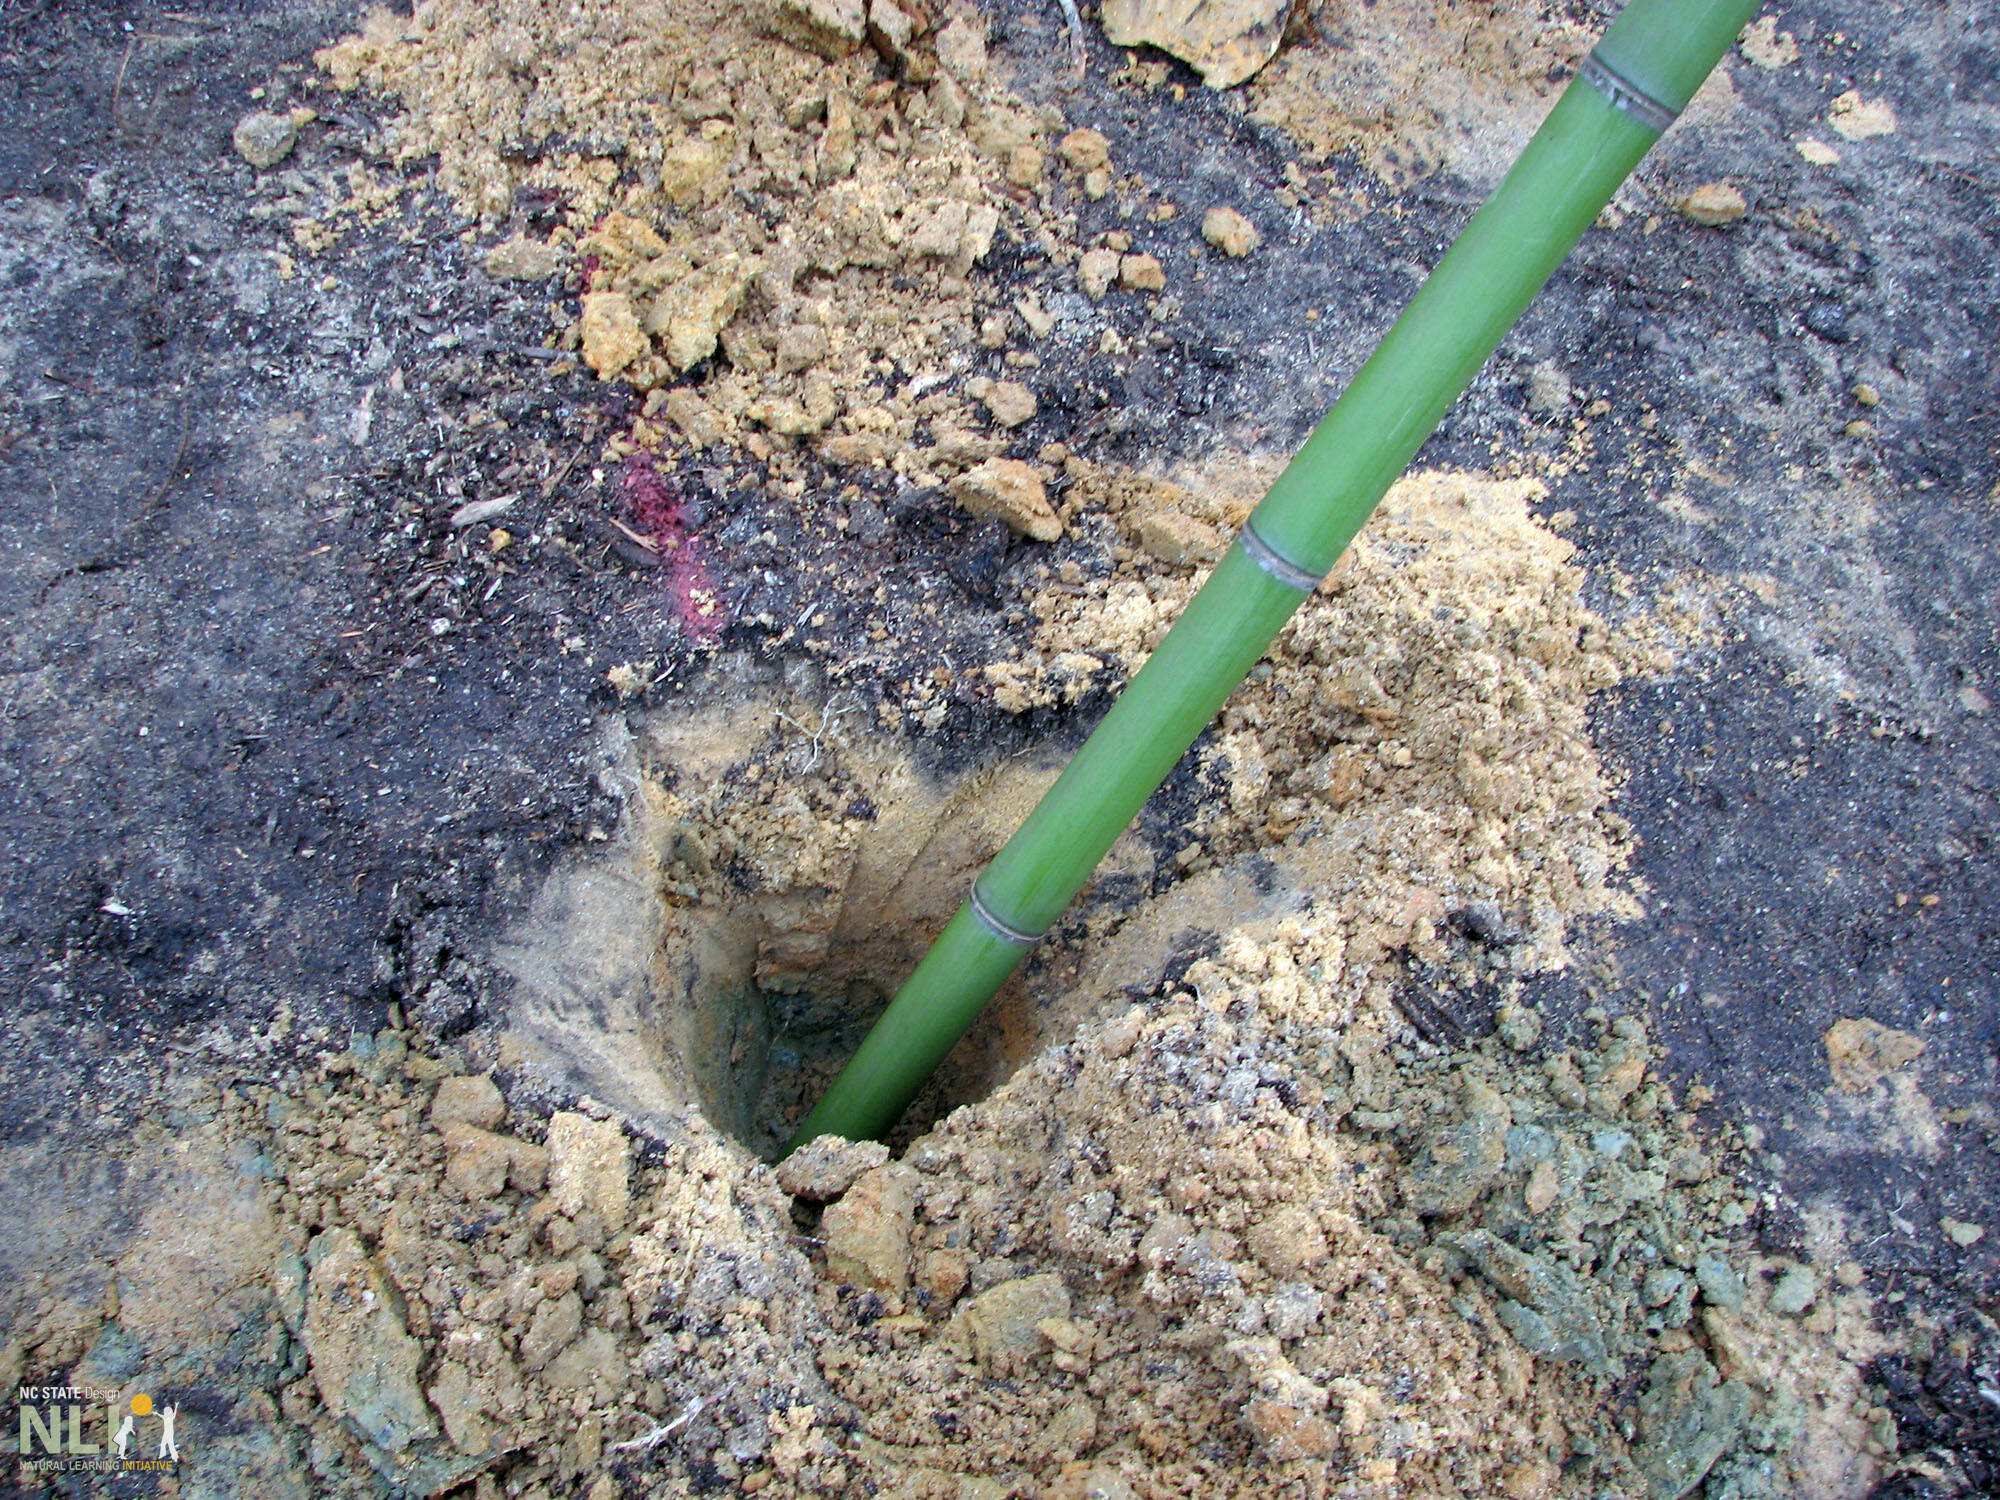
Bisect the circle between the first four poles and run twine through the center to locate poles 5 to 8 (Figure E). - Dig holes for poles
Dig holes approximately one foot deep and six inches in diameter for each pole (Figure F). - Create quadpod
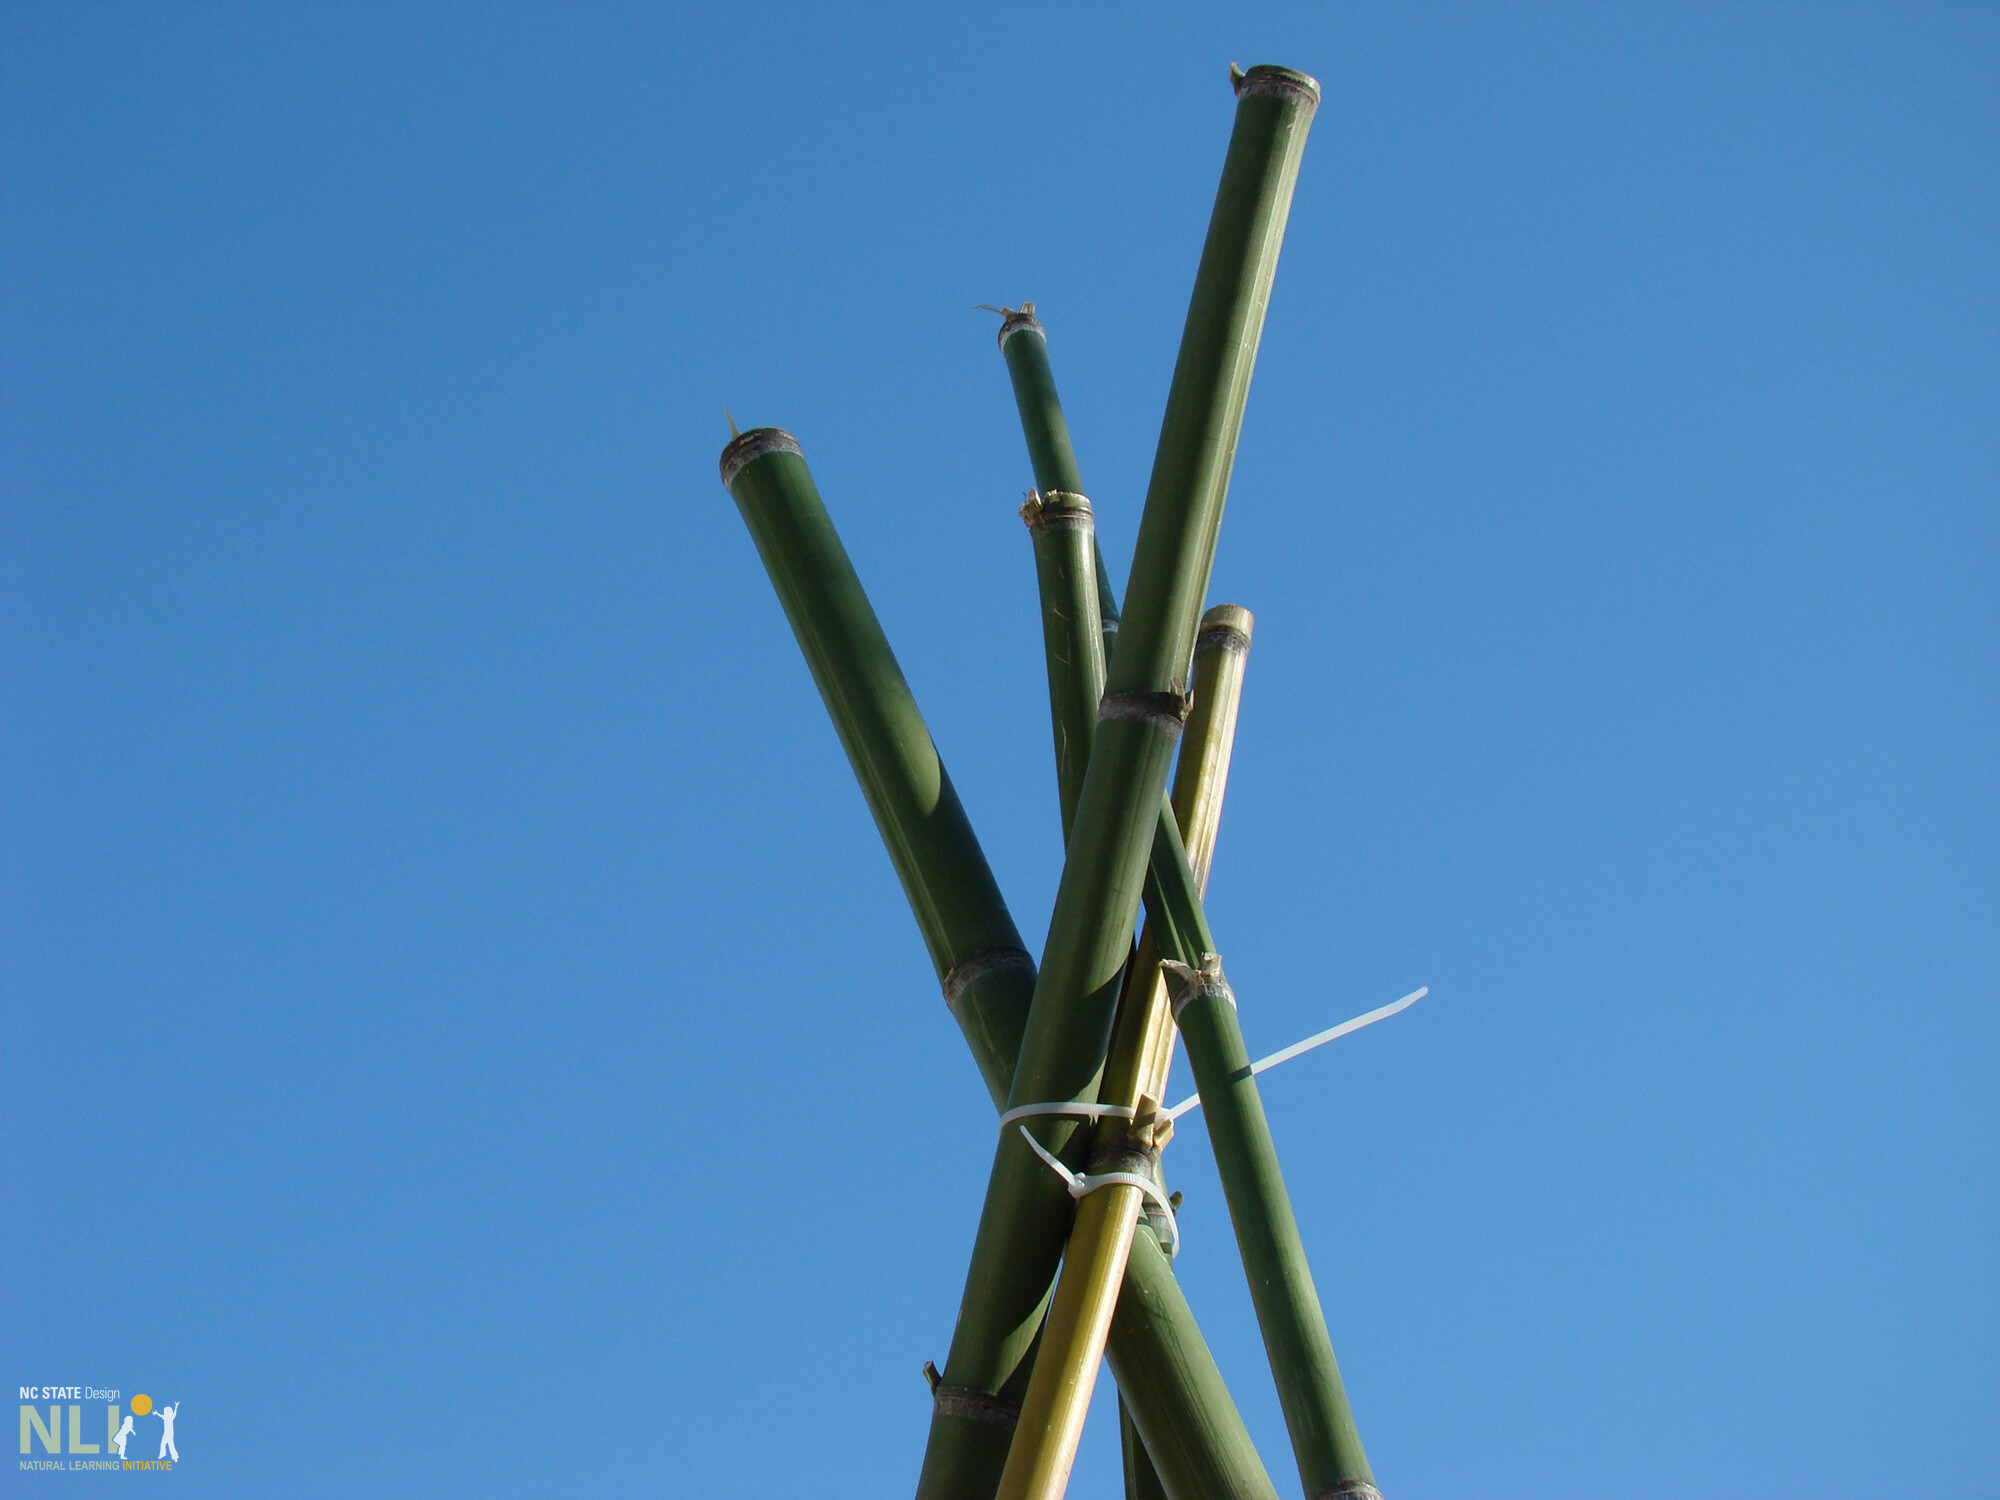
Select the four largest bamboo poles and lay them on the ground so that their wide ends (bottoms) are aligned. Approximately 1 foot from the top narrow end, bind the poles together using a plastic zip-tie (Figure G). - Bring quadpod upright and place in holes
It is important to keep the poles together as you bring them upright and then place them in the holes (poles 1 to 4, Figure B). Align pole bottoms to be flush with the earth. Adjust quadpod until junction of poles is above center of circle (Figure I). - Partially fill holes of quadpod poles
Partially fill the holes to hold the quadpod poles in place, but also allow for adjustments to be made. The soil will support poles while finishing construction. - Add additional poles and partially fill holes
Place additional poles 5 to 8 (Figure B) in their holes and lean them against the quadpod. Partially fill their holes with soil. - Secure poles to quadpod
Using plastic zip ties, secure the additional poles to the quadpod. A step ladder will be needed to reach the junction of the poles. - Bind all poles together
Using thick jute twine, bind all 8 poles together at the top junction (weaving in all directions). Securely tie. - Completely fill holes
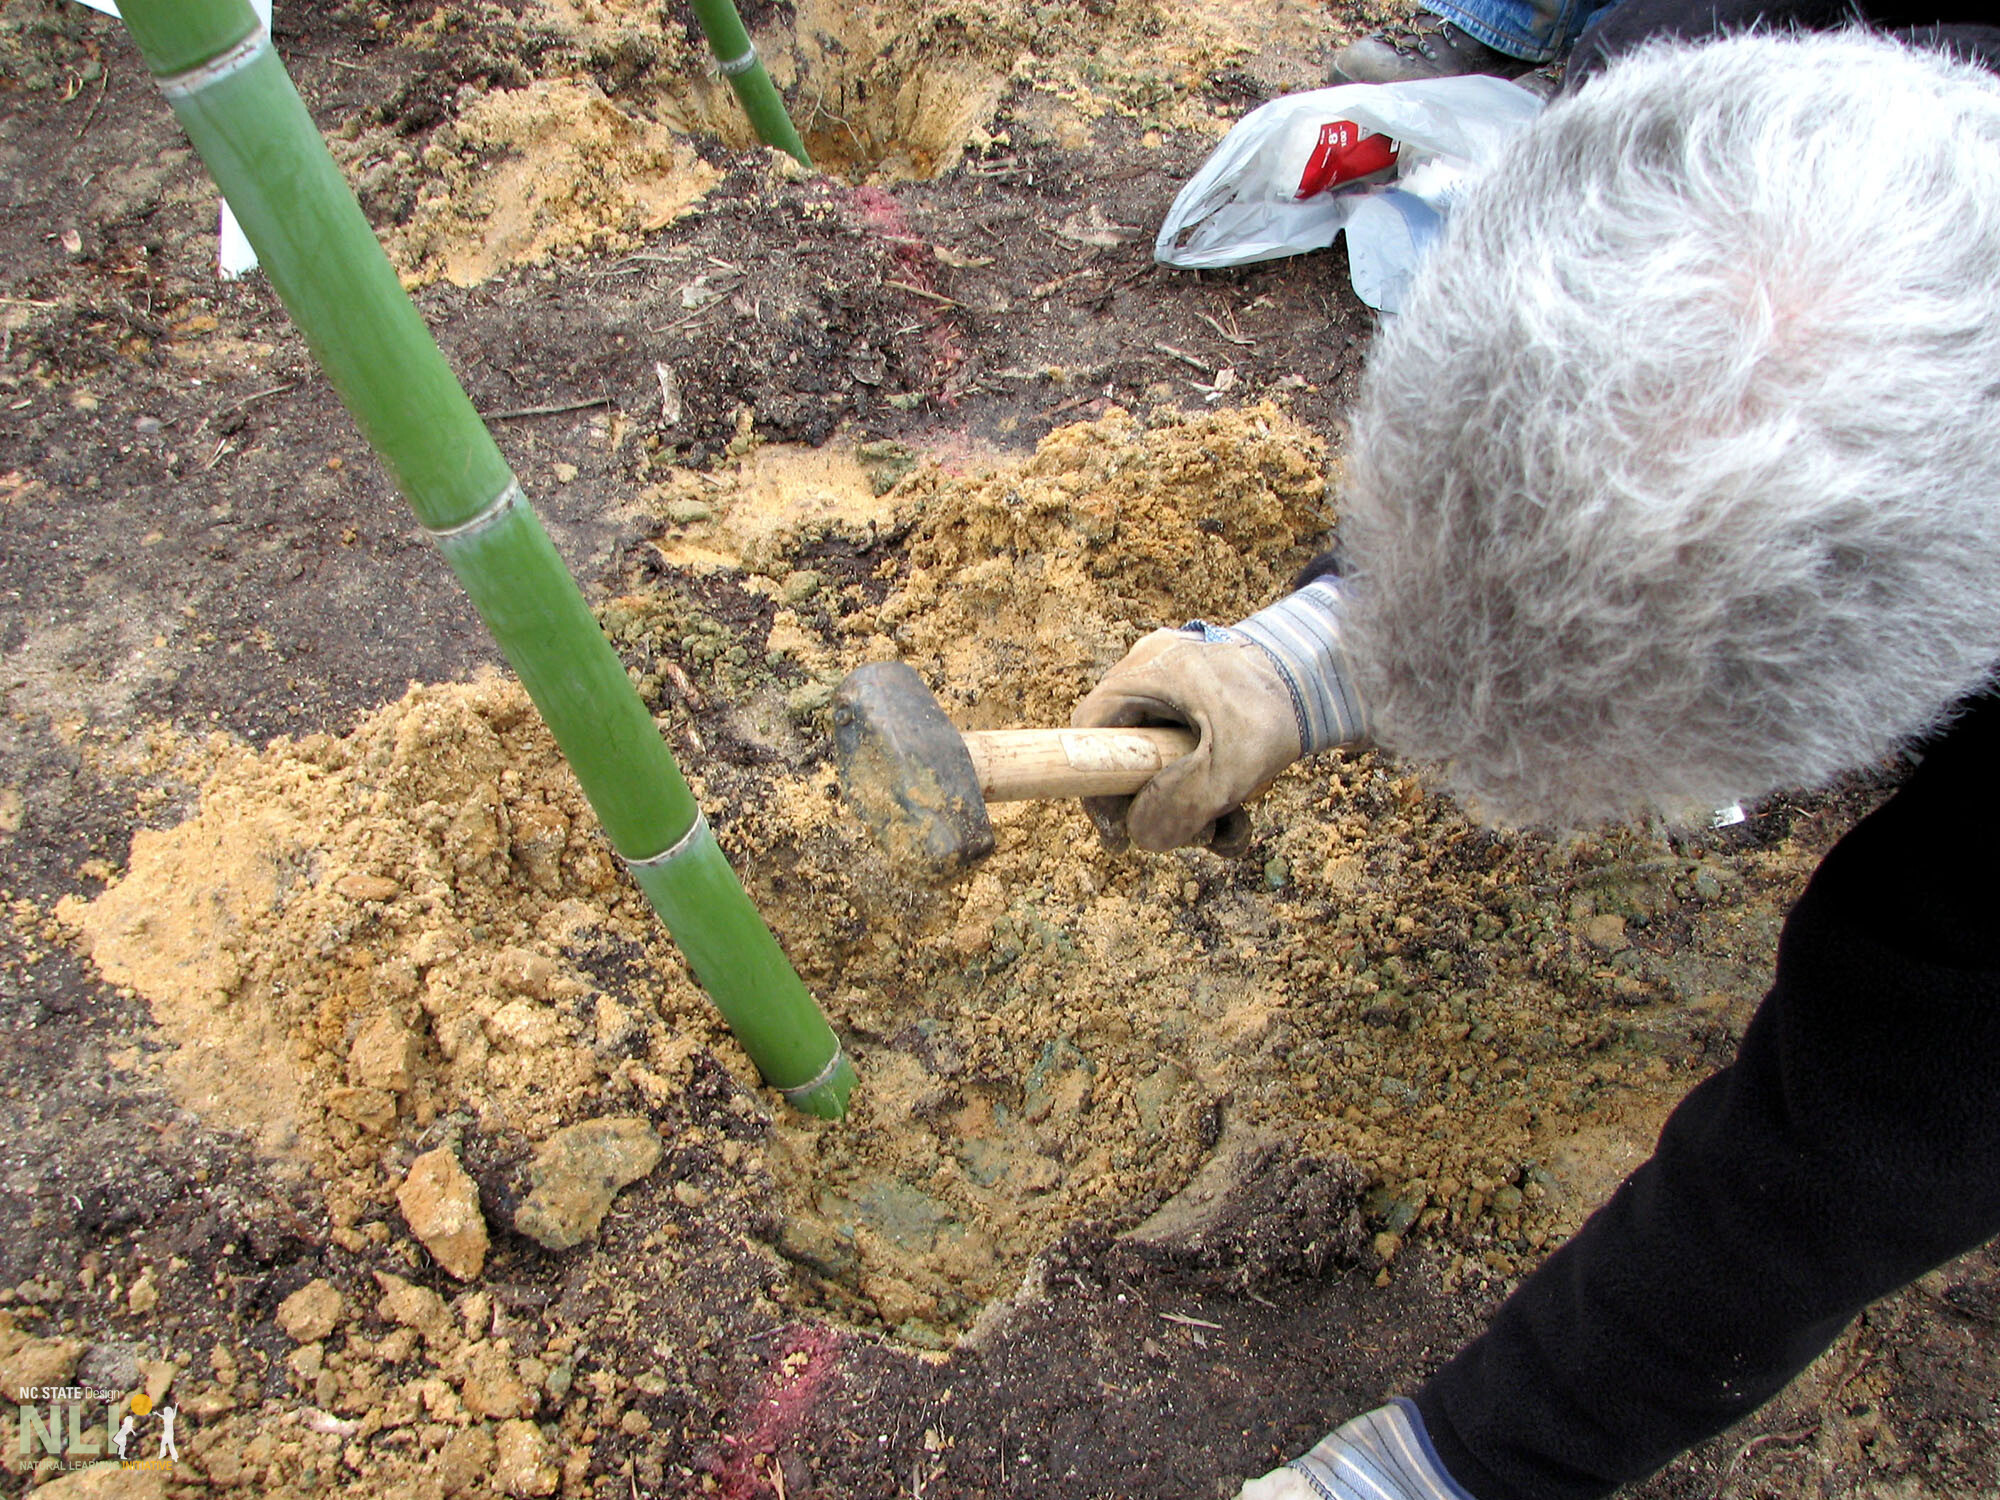
Finish filling the holes and carefully compact the soil with a hand compactor or pickaxe handle (Figure J). - Add twine for vine support
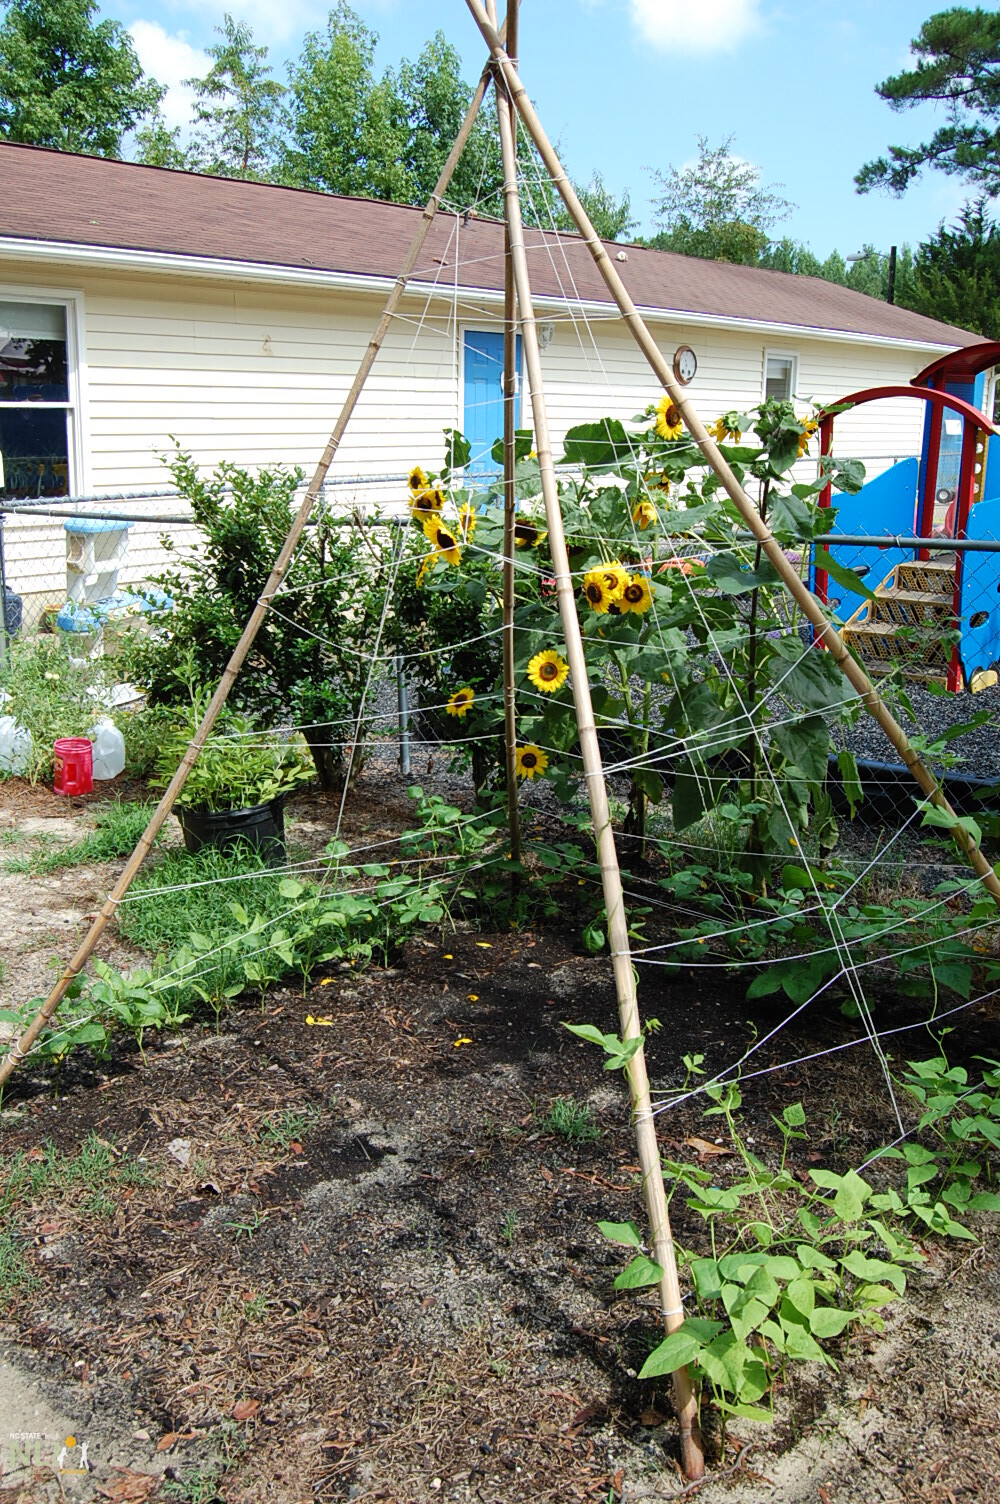
Support is needed for vines to climb and grow around the teepee (Figure J). Securely tie the end of a ball of jute twine at the bottom of a pole at the first node. Pull the twine tight and then secure it to the adjacent pole at another node. Repeat pulling the twine tight and return to the original pole at the node above the starting point. Continue a zigzag pattern 3/4 up the teepee (Figure J). Repeat “weaving” between each two adjacent poles, except at the entrance. - Plant vines and finish the teepee
Plant vines at midpoints between poles and add mulch around plants and teepee floor (Figure K). Vines should be trained on the woven twine and poles as they grow using “twist ties” to anchor them. Add sitting rocks, logs, and other decorations to the teepee interior. These final steps are open-ended, guided by the builders’ imaginations.
MATERIALS & TOOLS:
- Bamboo poles or steel rods (8)
- 14-inch plastic zip-ties (8-10)
- Shovel and/or
- Pickaxe
- Mulch
- Measuring tape
- Twist ties
- Sitting rocks or logs
- Spray paint
- Hacksaw
- Step ladder
- Jute twine
- Wooden stakes
- Annual, perennial, or fruit vines to plant around the teepee
Installation requires about one hour and 2 people to assemble
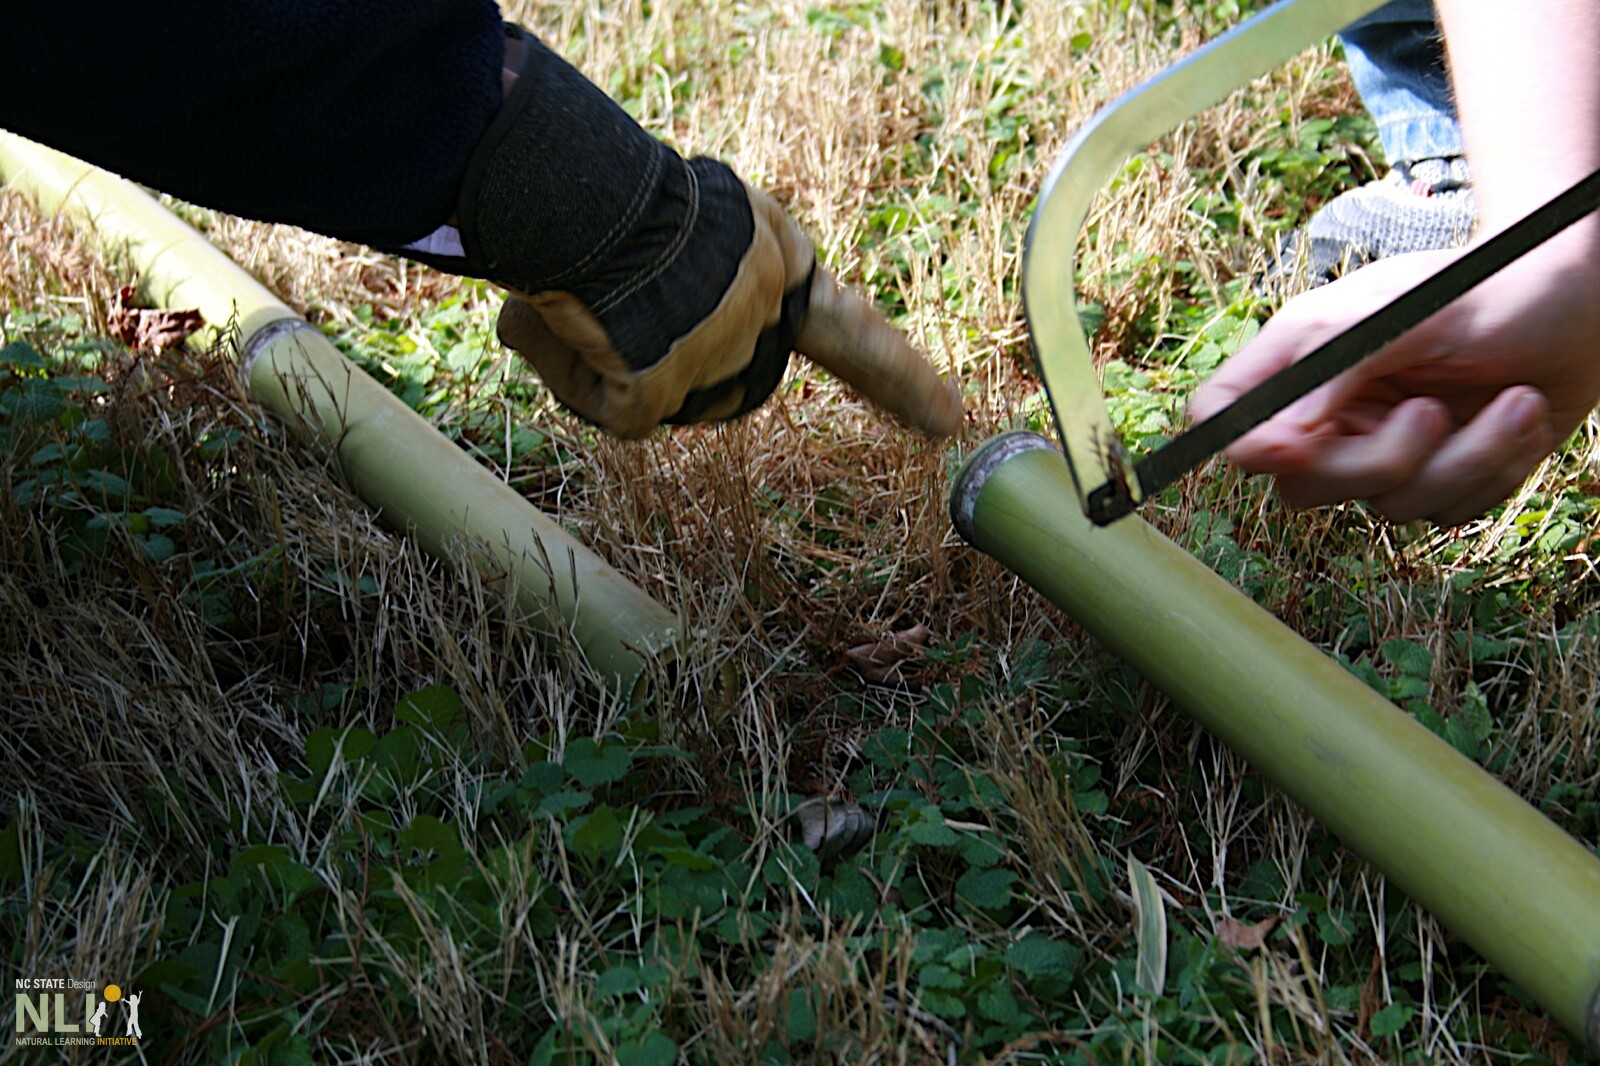
A. Cut poles to length above the cane node.
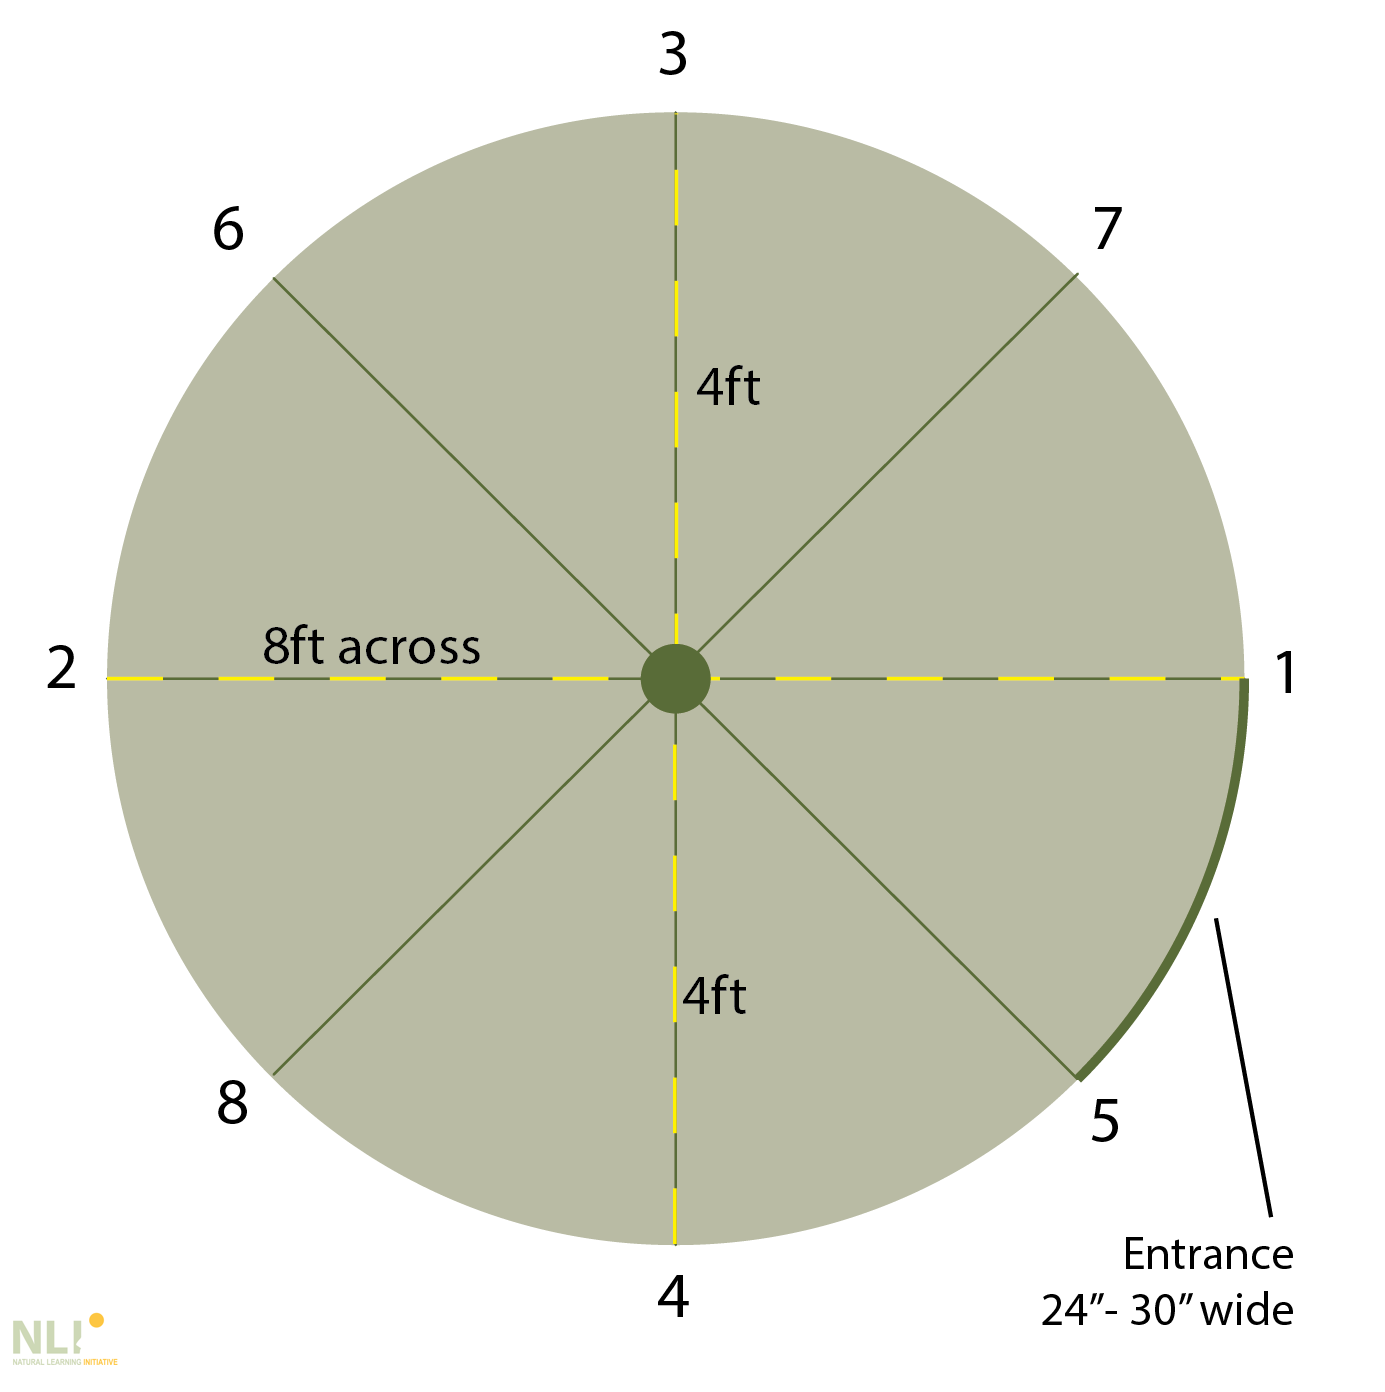
B. Sequence of marking pole locations

C. Mark the radius and locate the entrance.
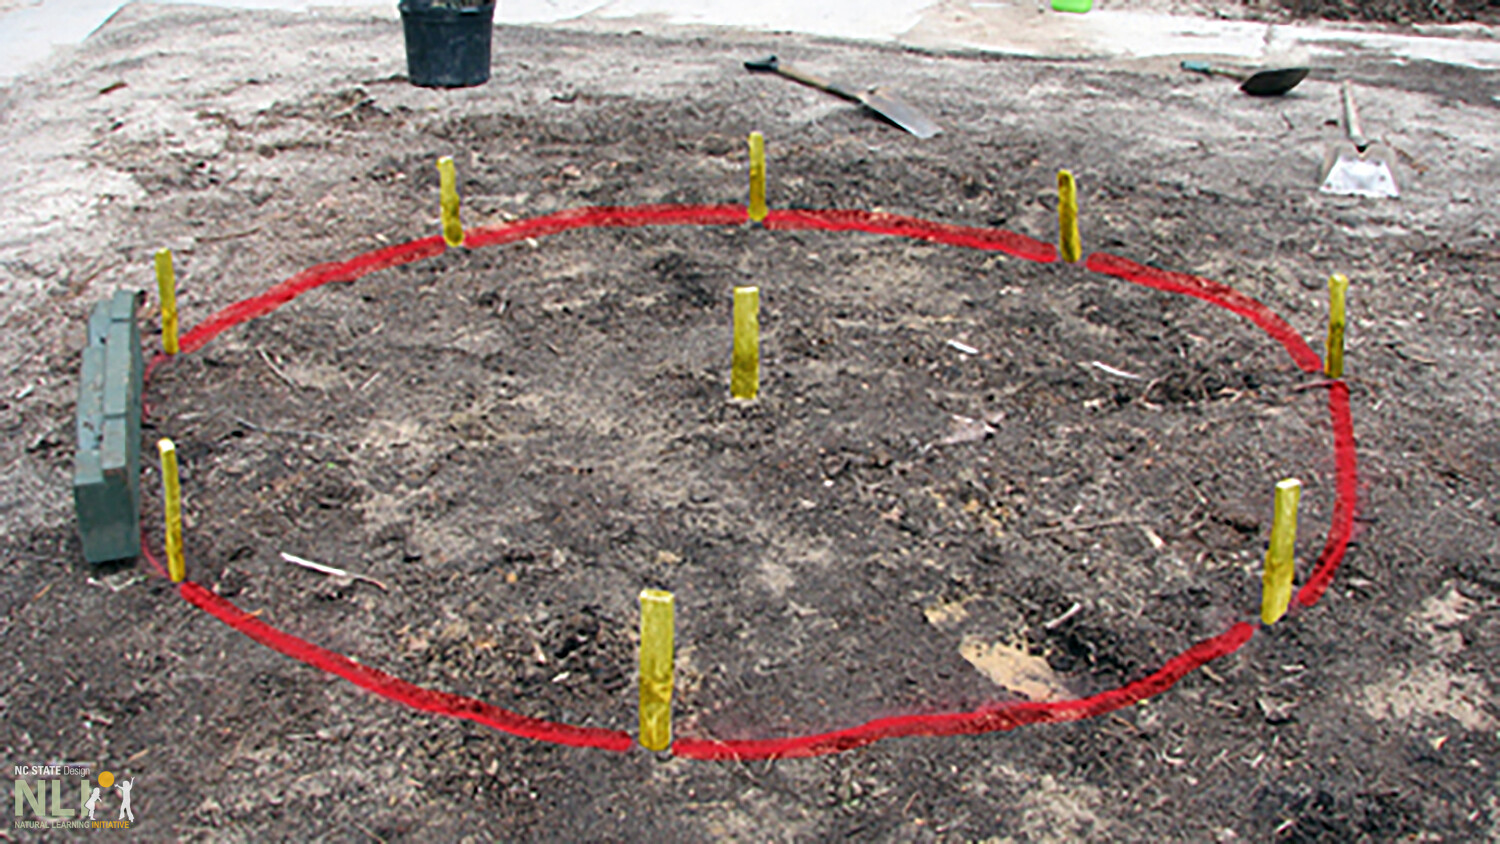
D. Mark the pole locations.
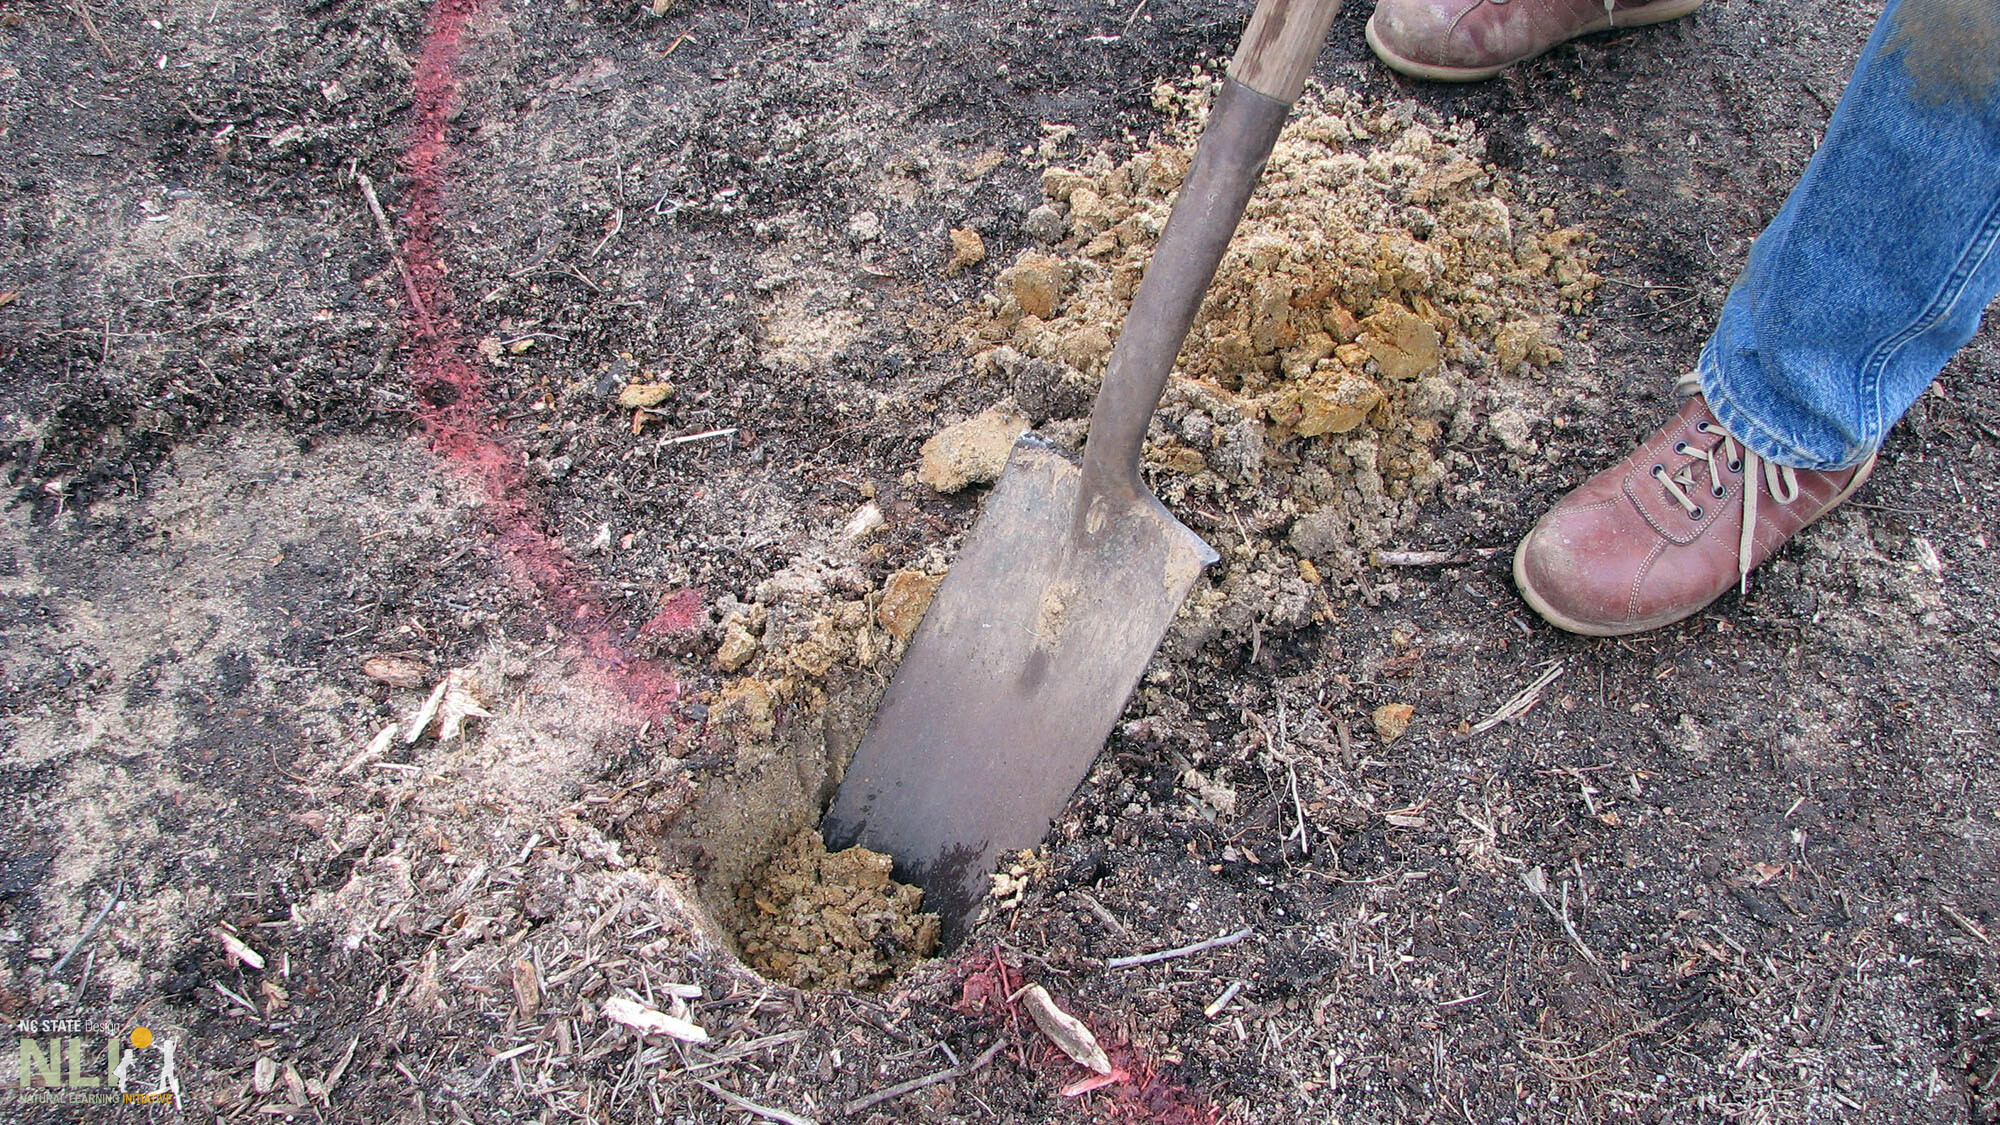
E. Dig holes for poles

F. Create quadpod
G. Place pole ends in holes
H. Center quadpod
I. Fill holes and compact soil.

J. Add twine in “zigzag” pattern for vine support.
K. Plant and watch the vines grow!