Infosheets
02. Top Ten Activity Settings For Outdoor Learning
Activity settings add value to outdoor learning environments (OLEs) by supporting specific play and learning activities. An outdoor stage, for example, enables a range of imaginative and dramatic play. The addition of trees, shrubs, flowers, and grasses to OLEs further increases play and learning value by connecting children with the wonders of the natural world. This InfoSheet introduces different types of activity settings and key design considerations for successful implementation.
1. INDOOR-OUTDOOR TRANSITIONS
When classrooms open to the outdoors, children and teachers feel intimately connected to the outdoor play and learning environment. Transitional spaces link classrooms with larger, shared play and learning areas and allow indoor-outdoor programming to be managed more easily. Key considerations include:
-
Type.
Transitional spaces can take the form of decks, pergolas, and patios. Depending on available space, planting beds, raised planters, or portable containers can be installed.
-
Enclosure.
Visible boundaries are crucial for communicating that transitional spaces are “private” classroom extensions. Coverings should be unobtrusive and relatively open to allow sunlight to penetrate (Figure 1).
-
Shade.
Vine-covered pergolas can provide a comfortable, semi-sheltered space of flowering vines and edible fruits. Deciduous shade trees can also improve comfort in summer and winter.
2. PATHWAYS
A structured hierarchy of pathways provides spatial structure and access to activity settings within OLEs (Figure. 2). Primary pathways directly connect indoor and outdoor spaces and provide easy movement for teachers and children. Secondary pathways create shortcuts and exploratory routes between primary pathway segments. Tertiary pathways lead to intimate landscape settings, branching off other pathways with unique textures (Figure 3). All pathway types promote physical activity by facilitating walking, running, chase games, and wheeled toy use (Figure 4). Key considerations include:
-
Surfacing.
Hard surfaces such as concrete, asphalt, or decomposed/crushed stone work best for primary pathways. Wood chips work well for secondary and tertiary pathways.
-
Edging.
Install low rails, metal hoops, or small stones to protect planting adjacent to primary pathways.
-
Alignment.
Continuous curves add a sense of exploration and motivate children’s movement.
-
Width.
Make primary pathways at least 5 feet wide to accommodate wheeled toys passing each other. Avoid sharp corners, bottlenecks, and dead ends.
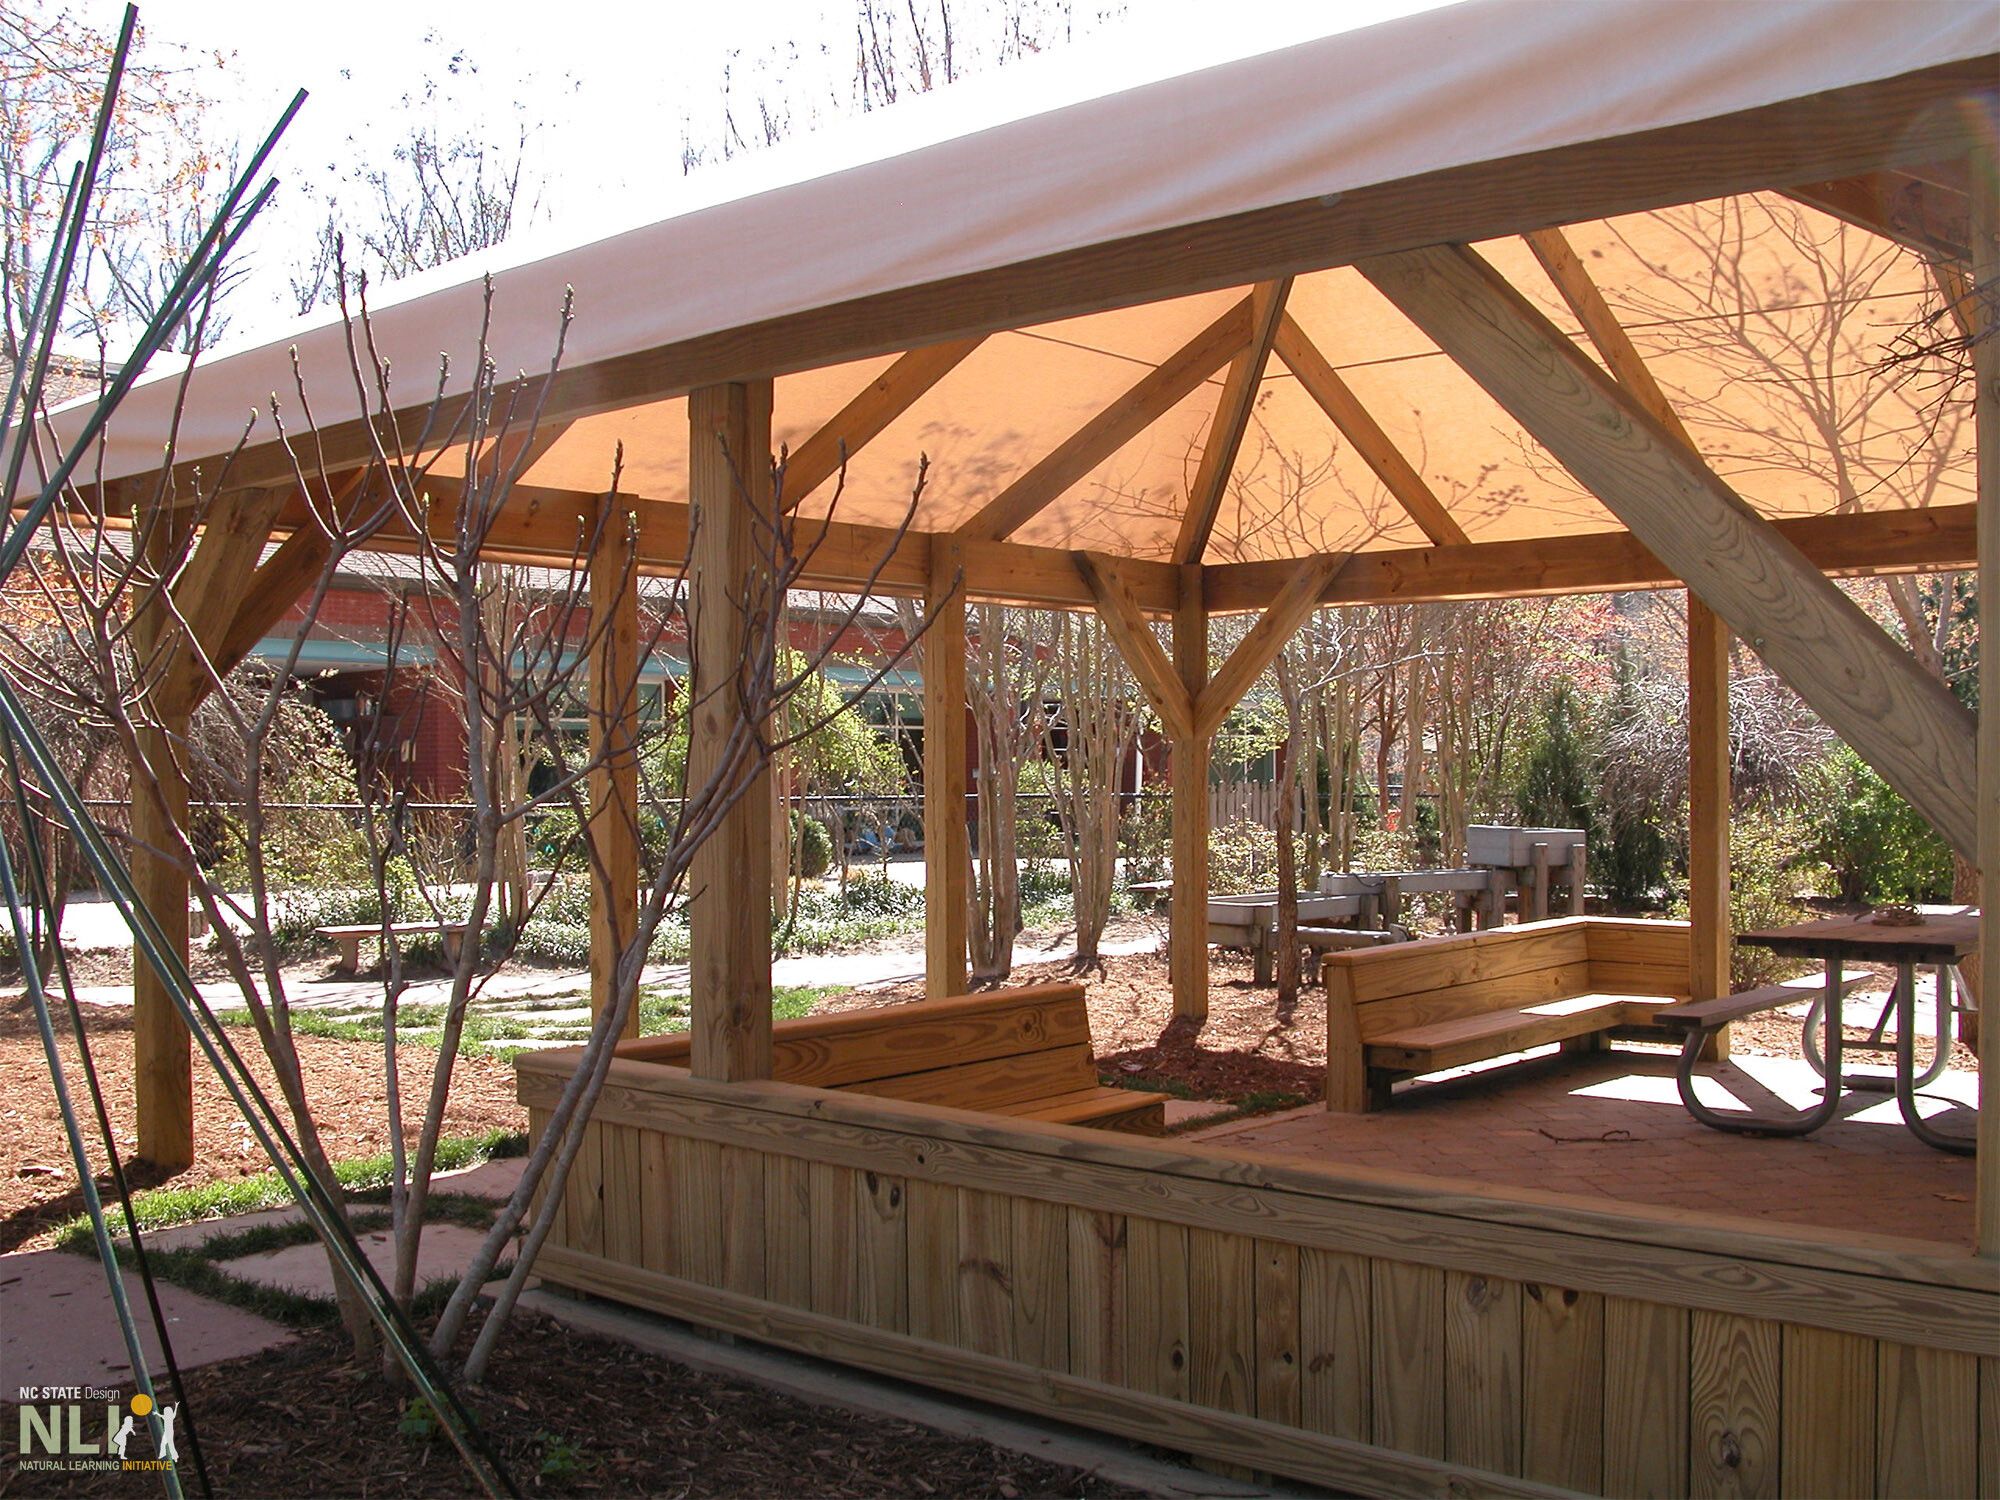
3. GATHERING SETTINGS
Gathering spaces encourage children to meet and work together in small groups, stimulating social interaction and cooperative relationships. Such spaces can support art-making, storytelling, and science exploration. Key considerations include:
-
Location.
Gathering settings should be located adjacent to high activity zones and program bases so that tools and materials are close at hand.
-
Types.
Options range from simple log or stone circles to substantial pergola-type structures. Consider creating differently sized gathering spaces for both intimate and large groups. Vine or fabric-covered tee-pees are an attractive, inexpensive option.
4. DECKS
Available in many shapes and sizes, decks provide dry, above-ground surfaces for all-season play. As gathering places for children, decks support diverse social and imaginative play. Larger decks can accommodate educator-facilitated group activities. Designed as stages, decks support expressive group activities and dramatic play, including storytelling and talent shows. Key considerations include:
-
Size.
A minimum width of 4 or 5 feet provides useful activity space—up to 15 feet affords greater diversity.
-
Location.
Against site boundary fences or in fence corners is recommended. Avoid differences of more than 6 inches in level between a deck and the ground.
-
Shape.
Squares, rectangles, hexagons, and octagons are easy to construct with timber (Figure 6). Specialized polygons can be easily constructed to fit particular location dimensions.
-
Enclosure.
When located against a fence, trellises or lattices around the perimeter of a deck can add a sense of enclosure while maintaining visibility for educators.
-
Shade.
A vine-covered arbor overhead can transform the deck into a shady, fragrant space.
1. A covered open indoor-outdoor transitional space.
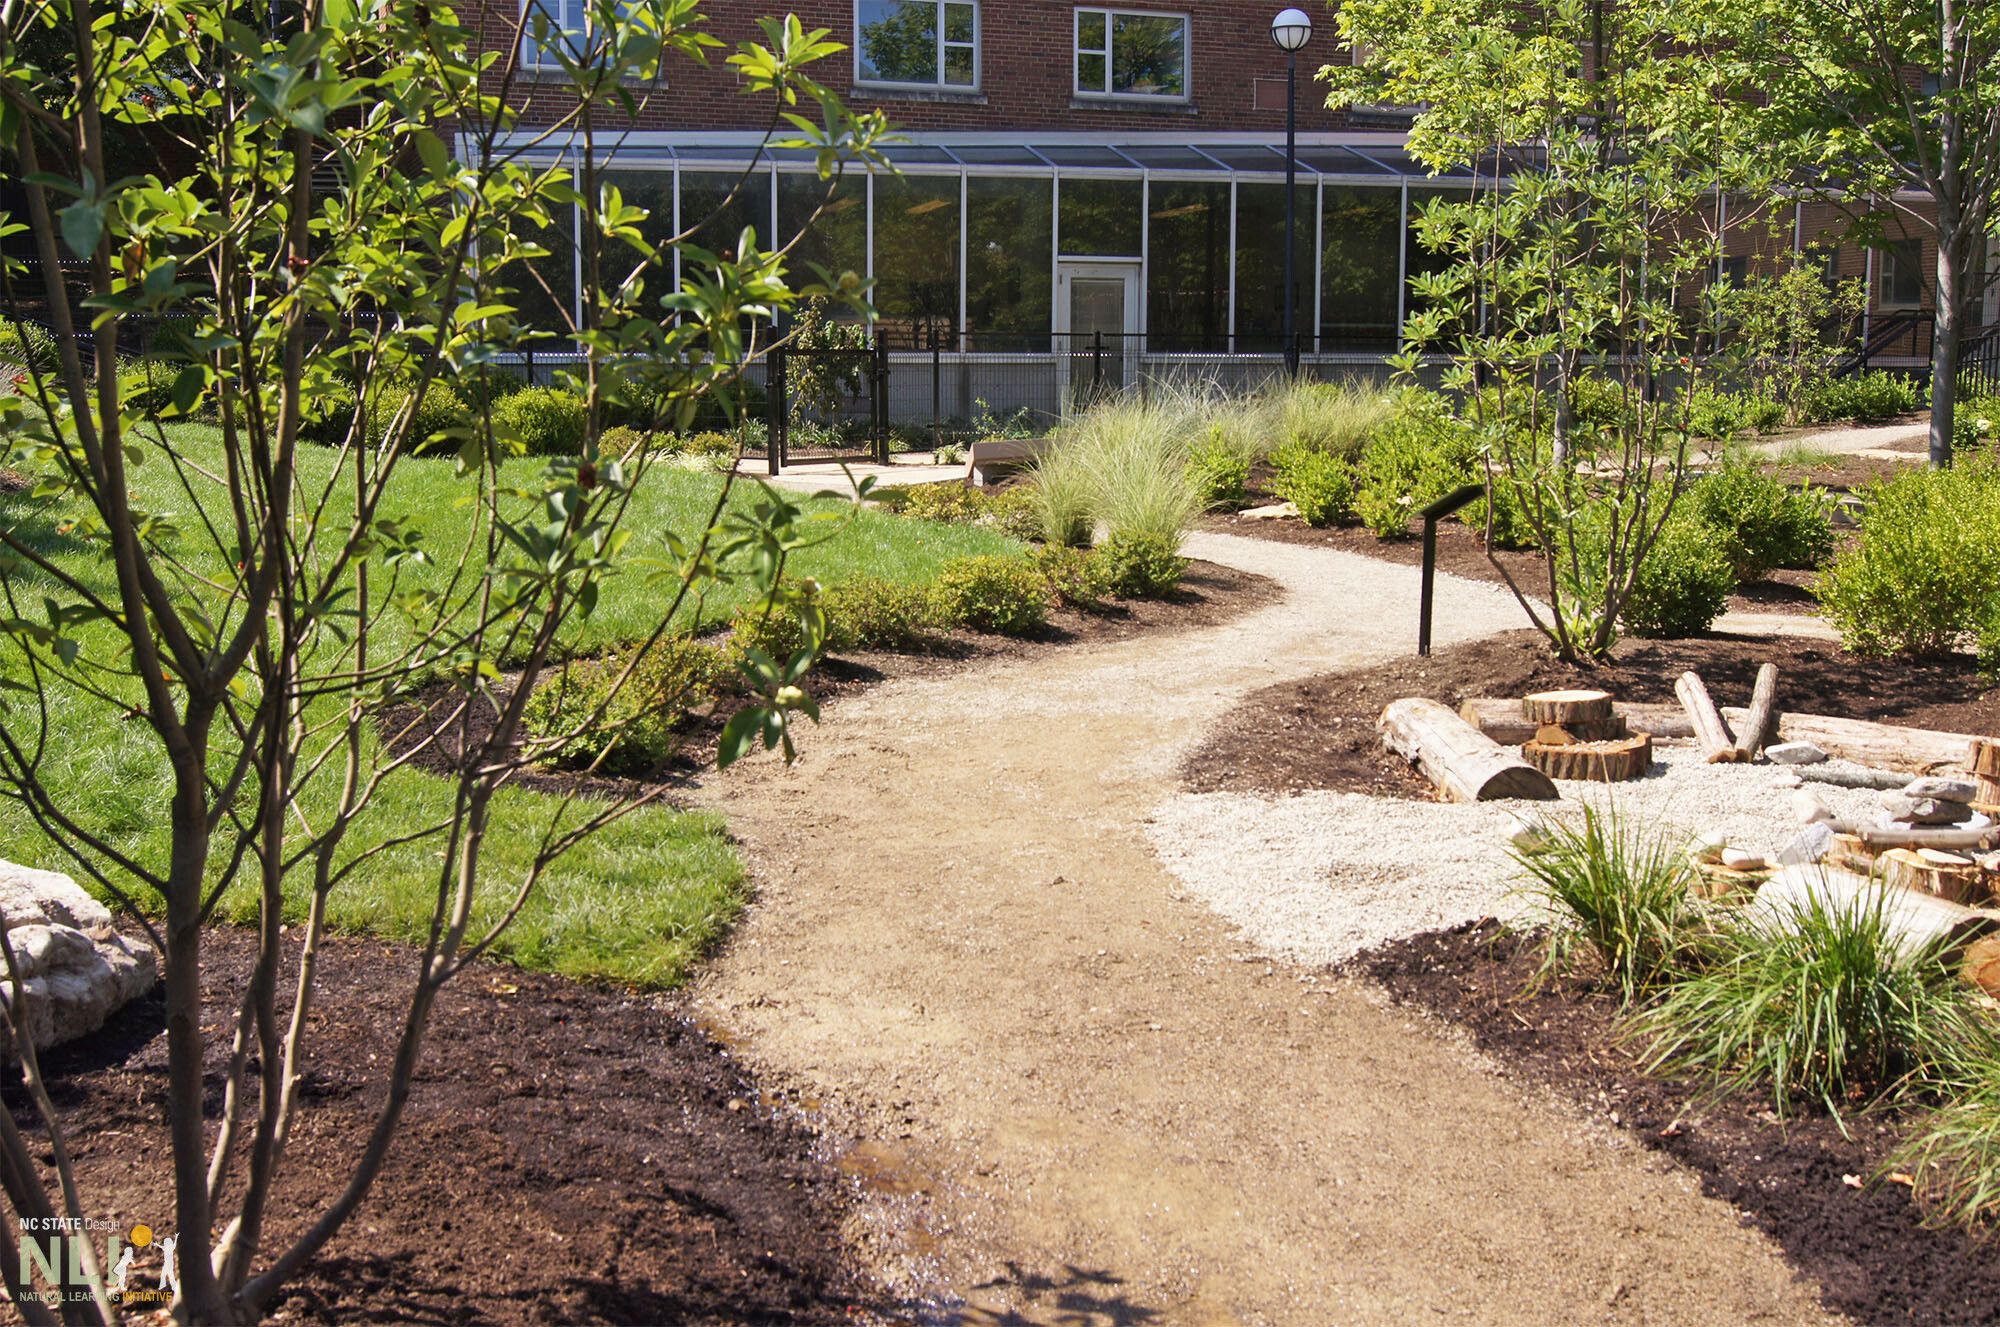
2. A primary pathway with adjacent plantings and settings.

3. Tree cookie path.
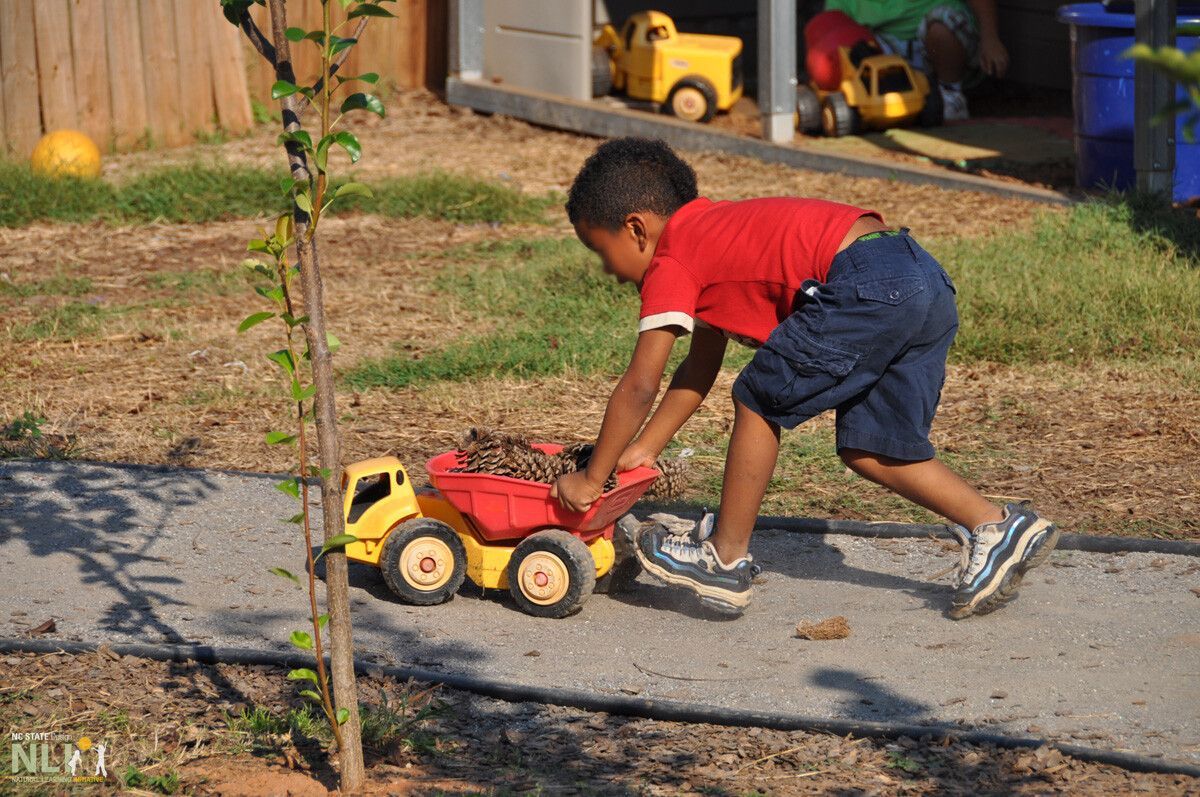
4. Pathways promote physical activity.
5. A gathering space adjacent to active play settings.

6. A versatile play deck.
7. An enclosed play lawn, ideal for mobile play equipment.
8. An enclosed sand play area with interior benches.
9. Mud making and water play.
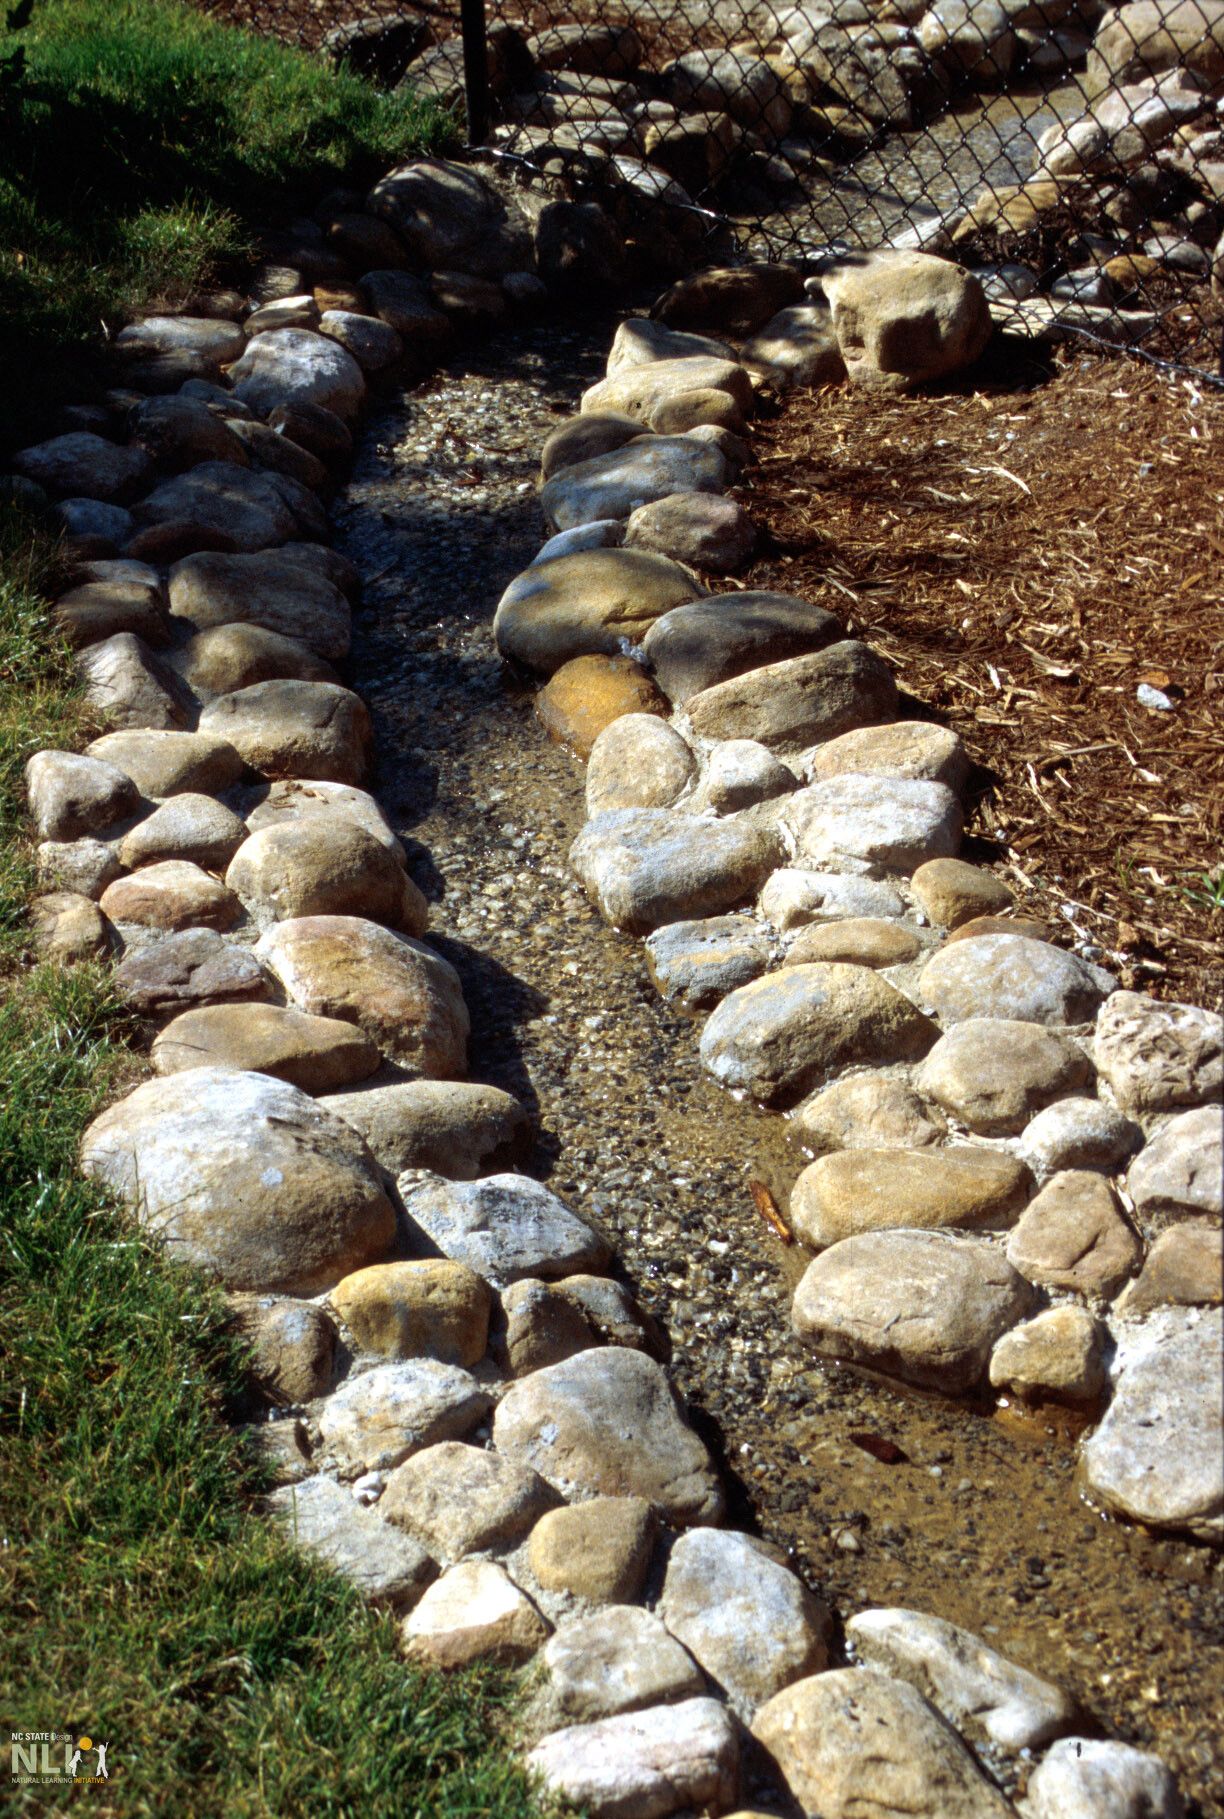
10. Dry stream bed.
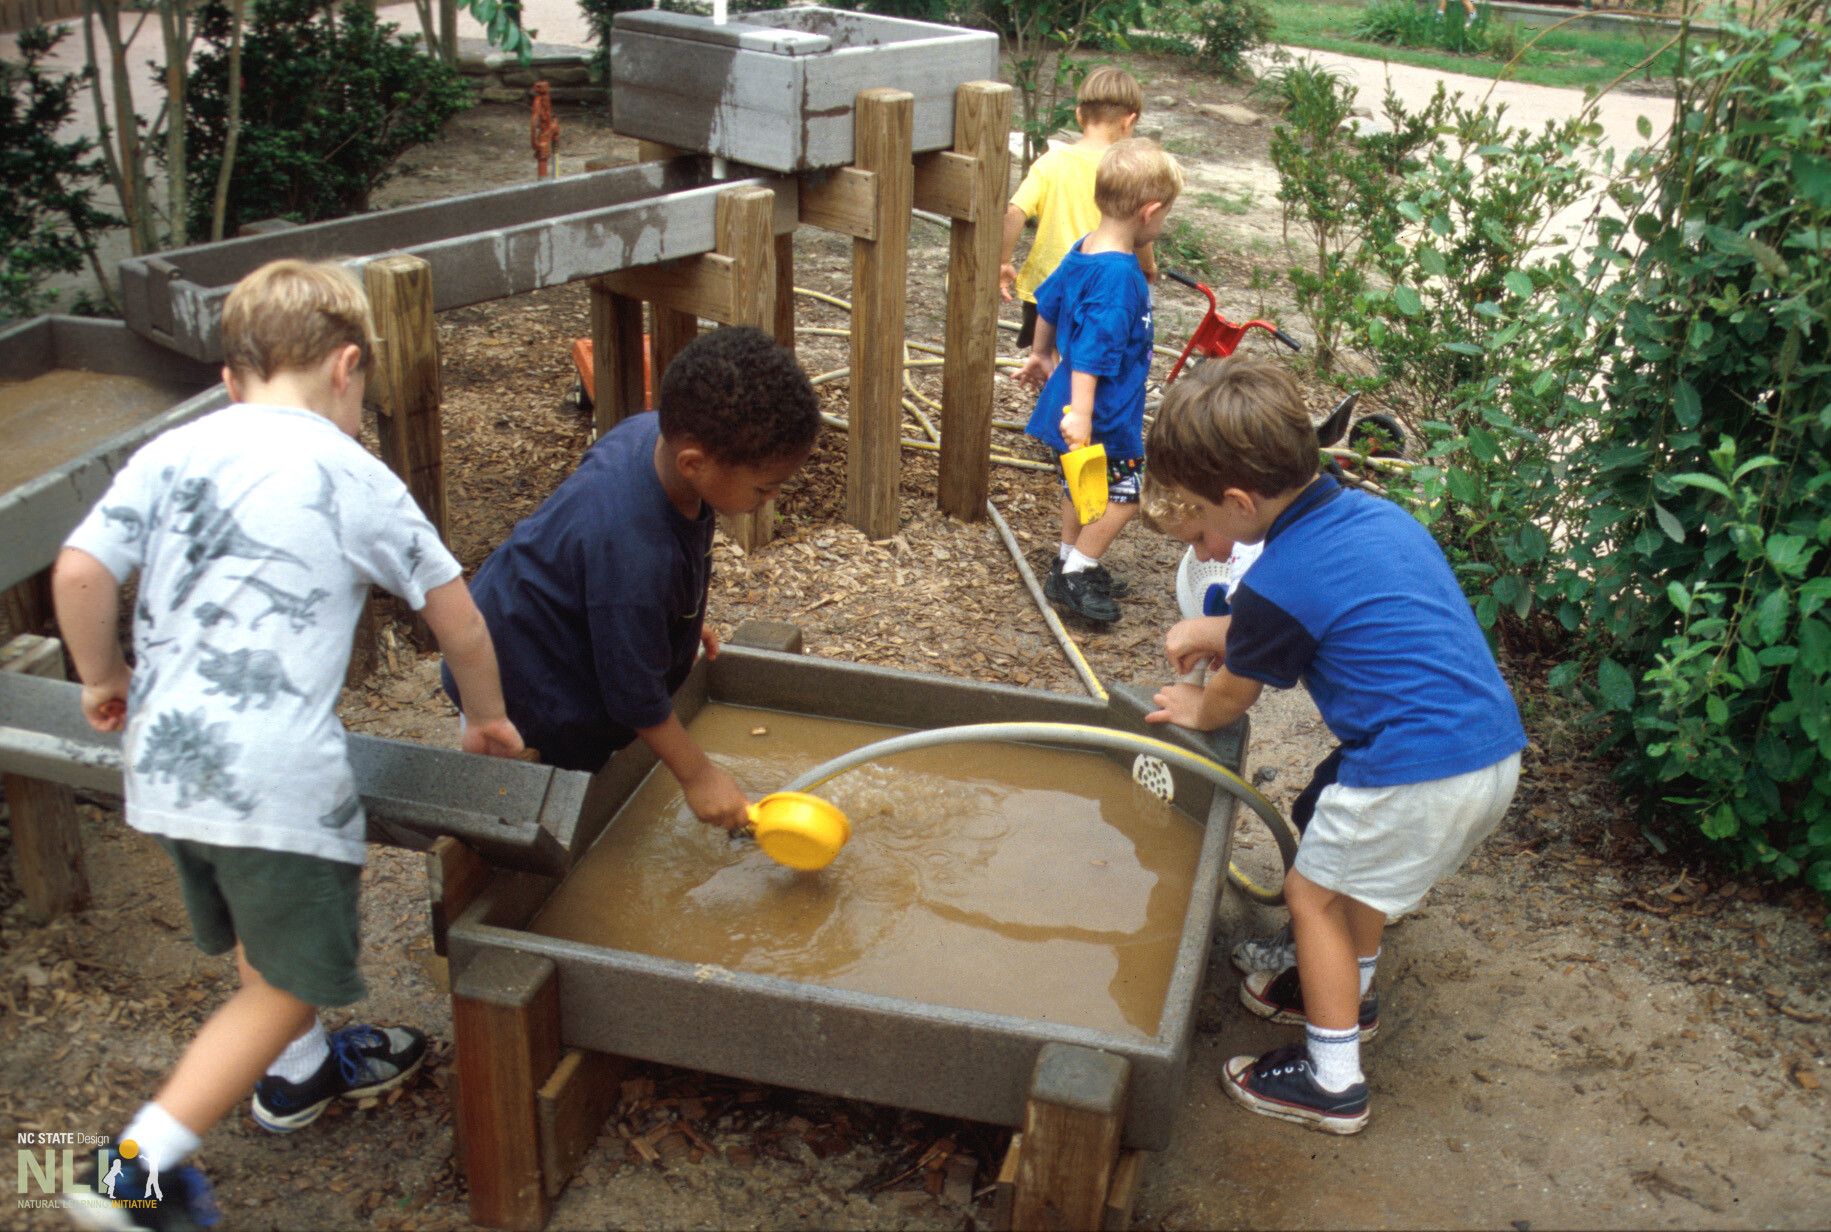
11. Water tables at different heights allow for diverse play.
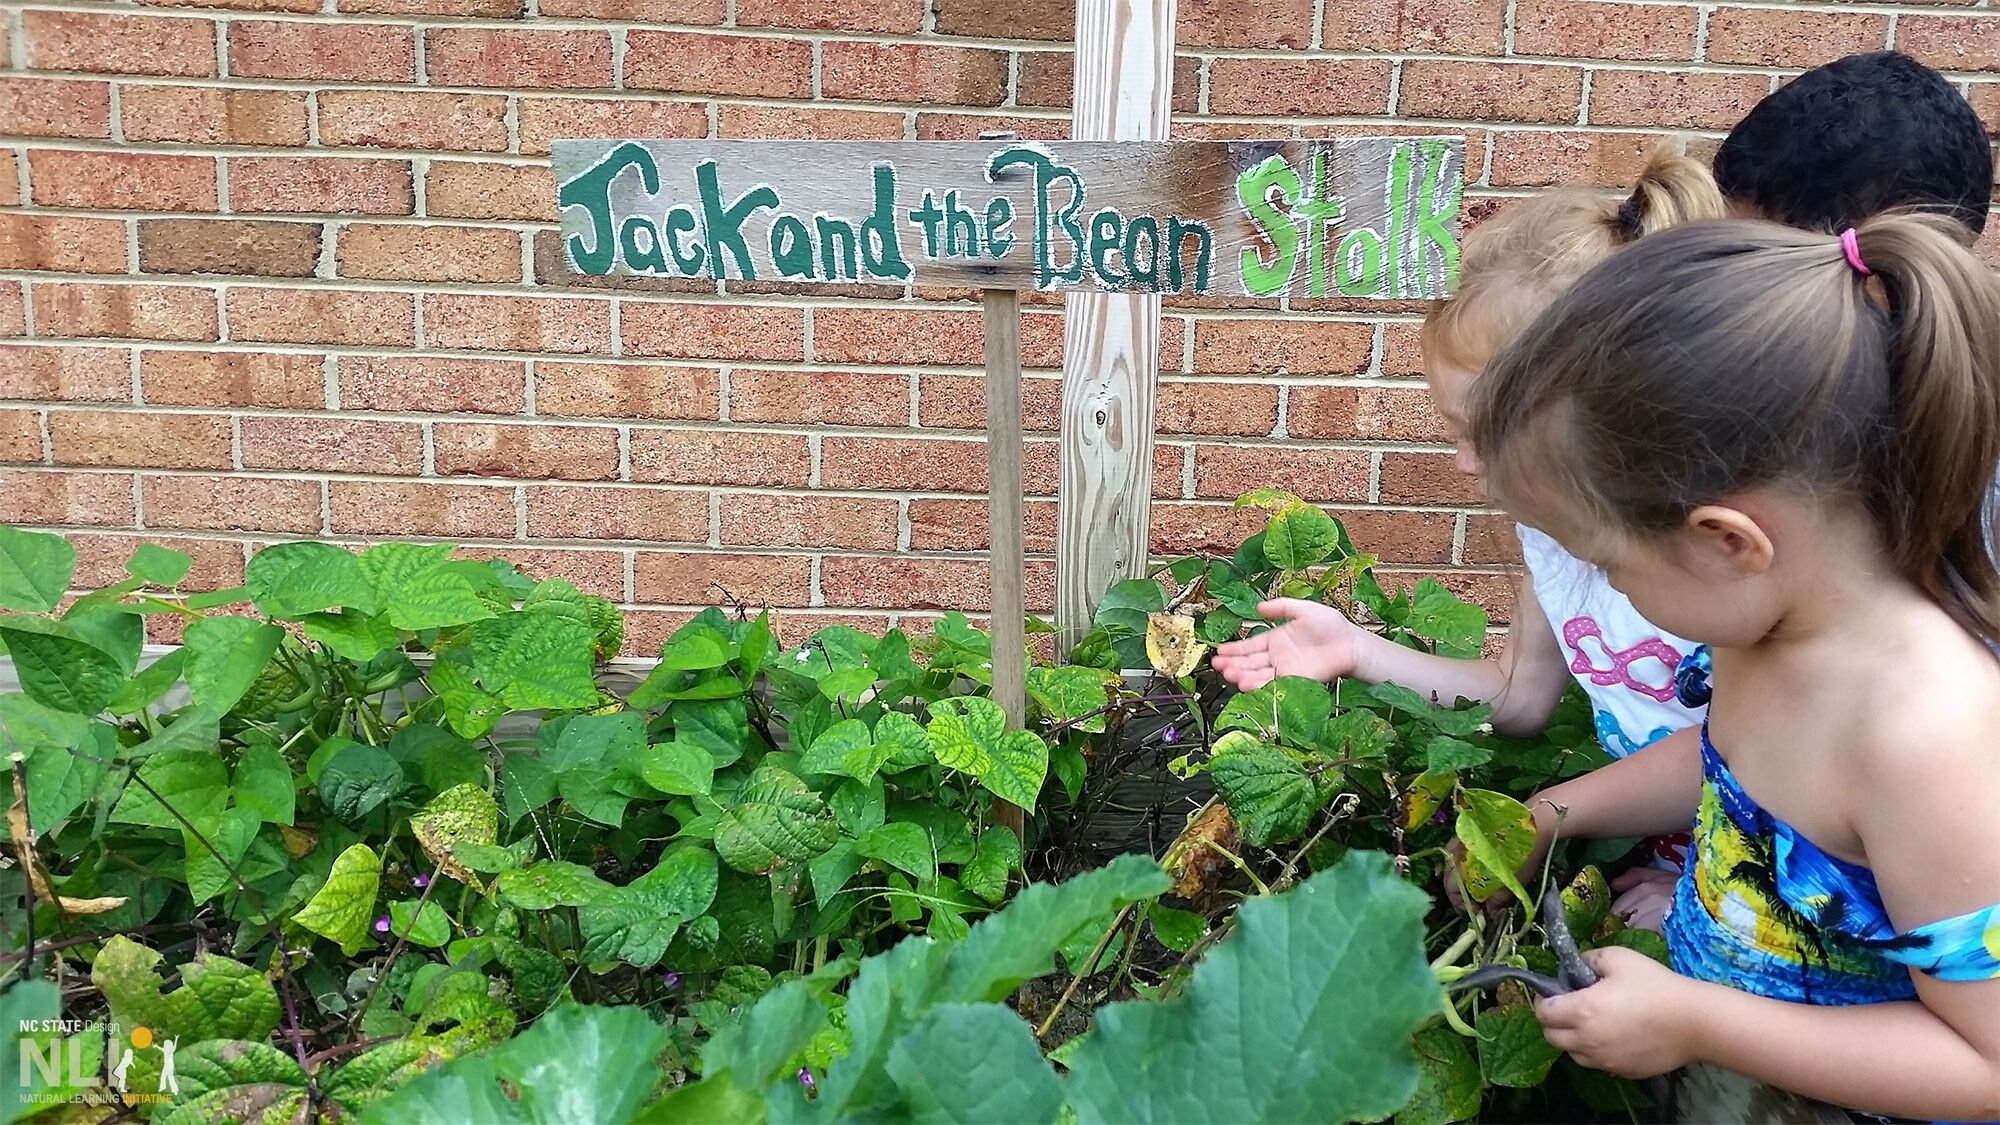
12. Edible landscapes connect children with nature.
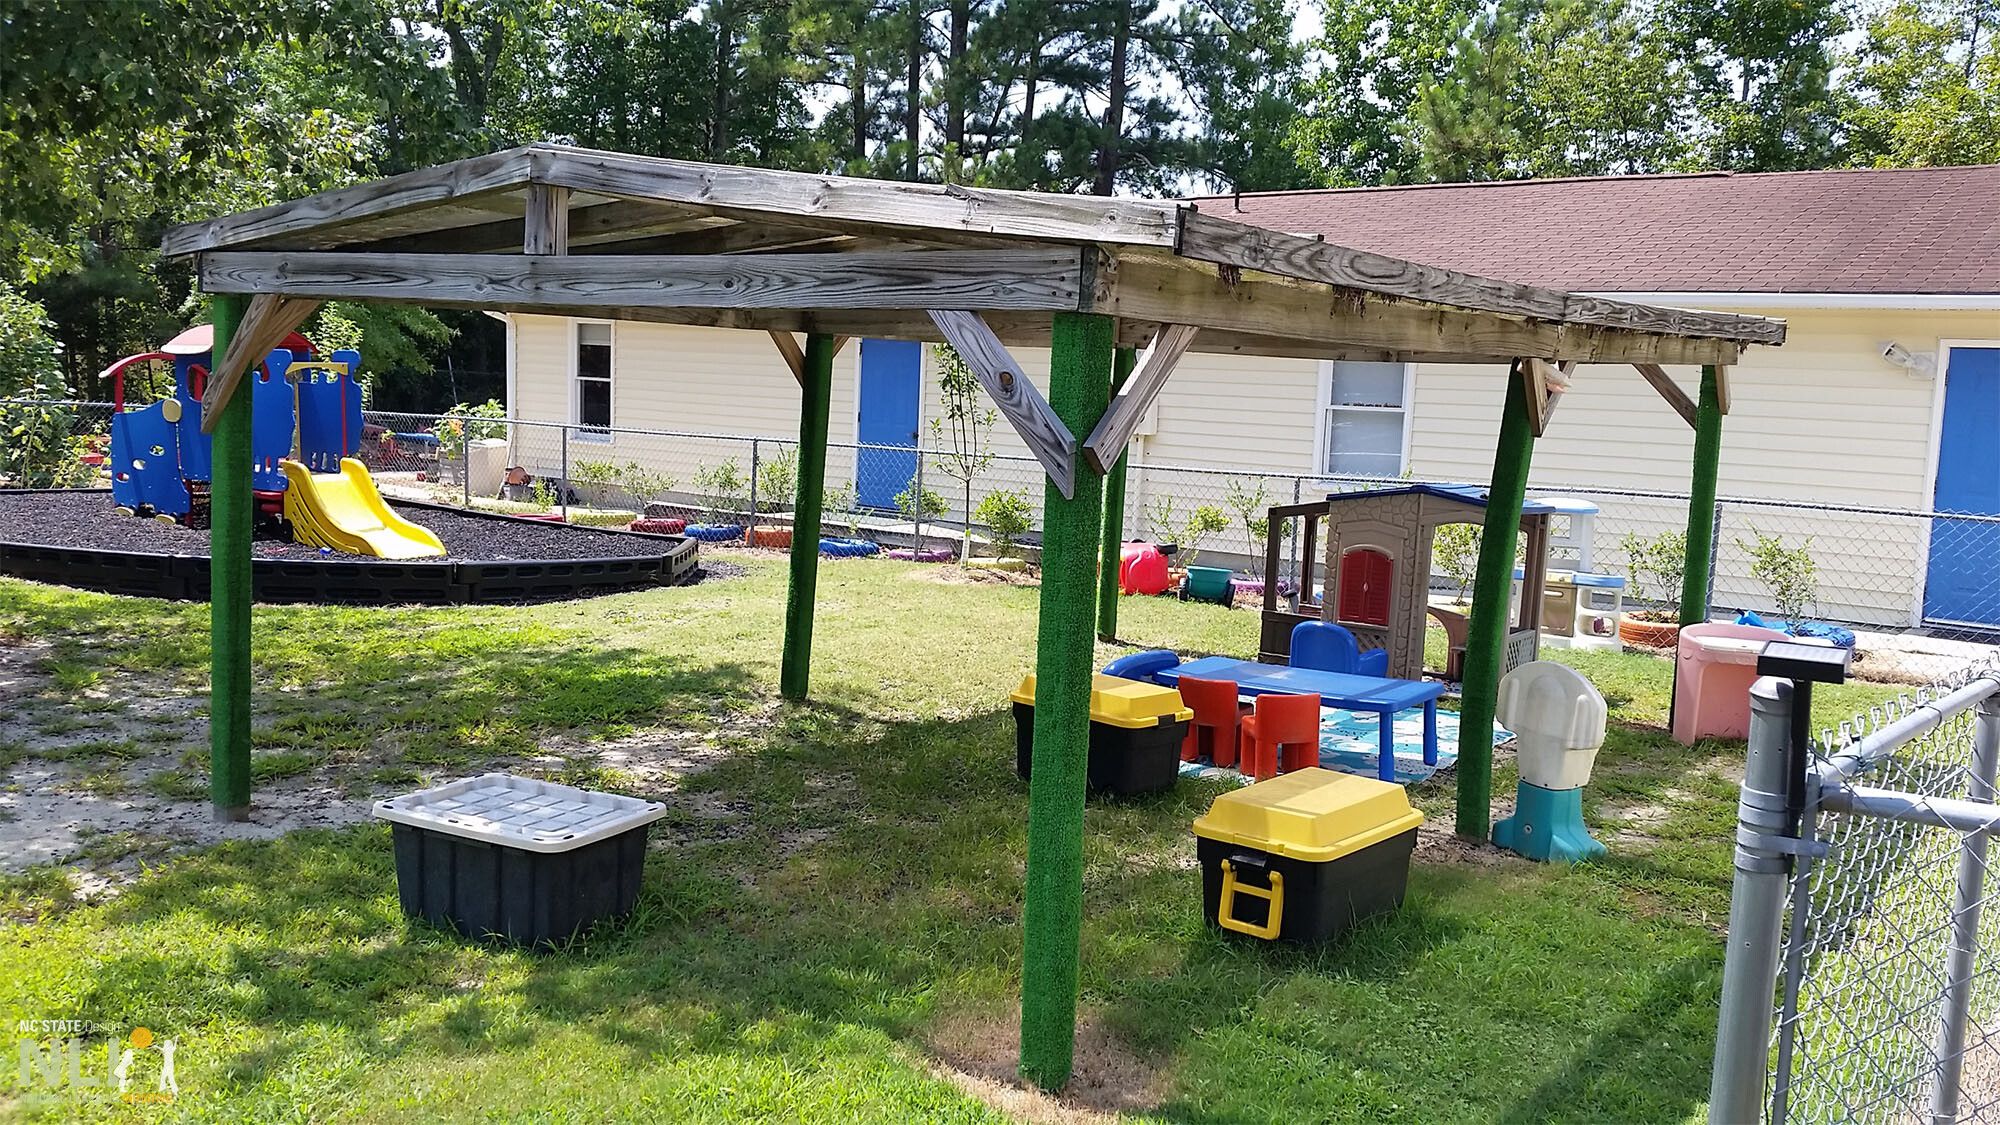
13. A covered shelter serves as a learning space.

14. Vines growing on a wire armature create a shady tunnel.
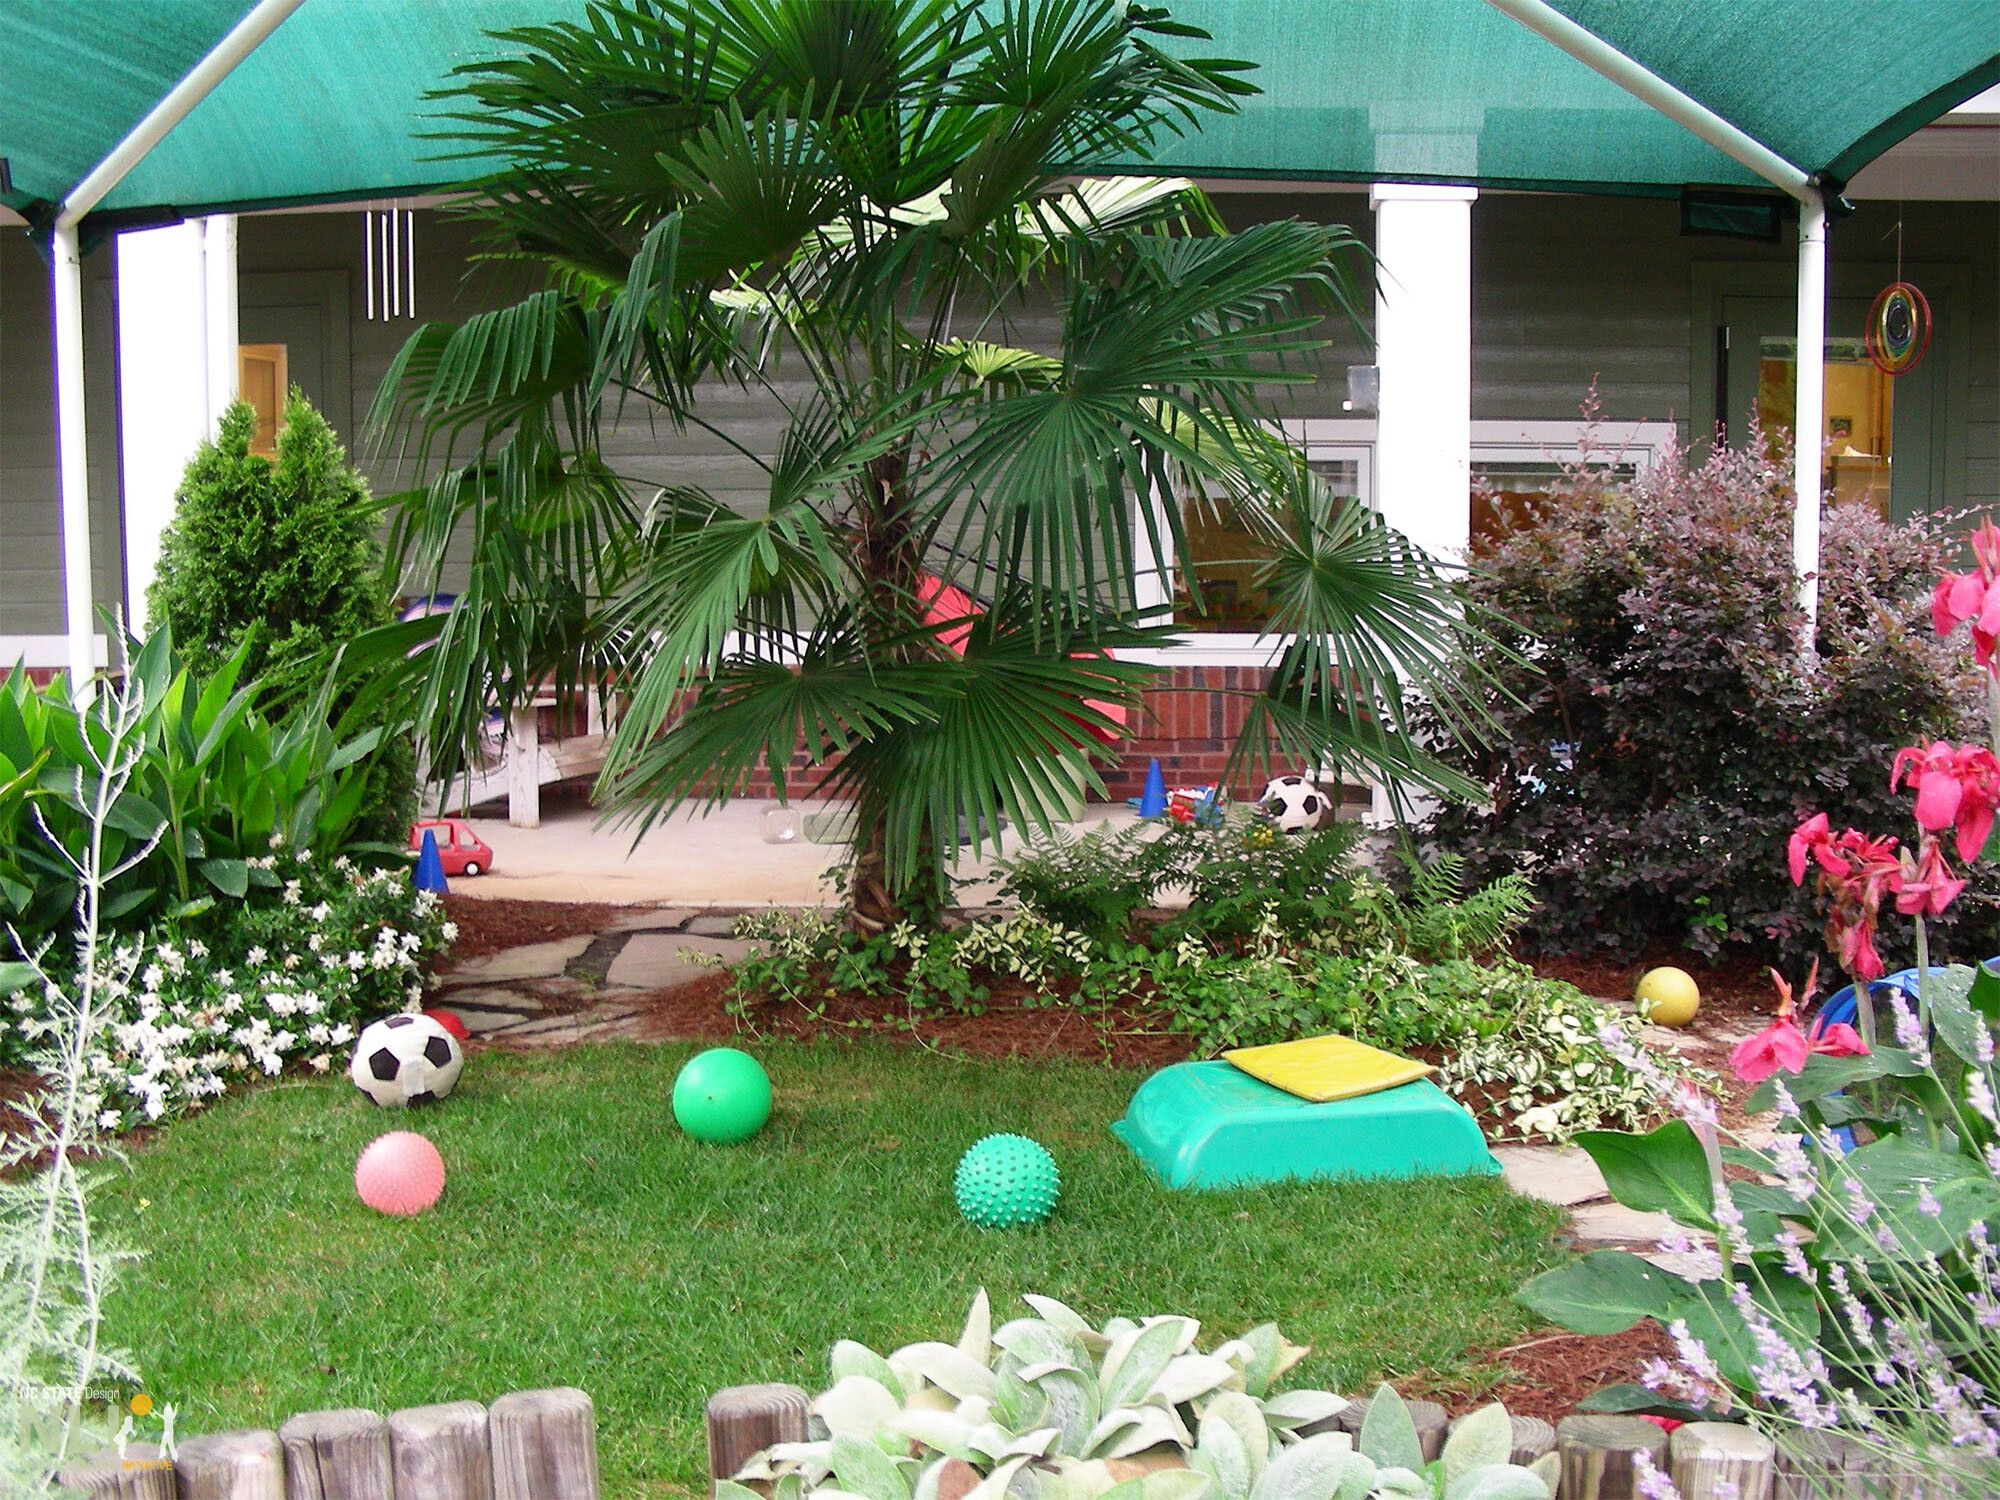
5. MULTI-PURPOSE LAWNS
Multi-purpose lawns support high-energy group games, water play, and the exuberant joy of running — activities that promote cooperation and gross motor development. Lawns provide an ideal space for play with balls and other types of mobile equipment that require a soft surface (Figure 7). Lawns can accommodate social gatherings such as story time and offer a place for simply relaxing. Key considerations include:
-
Size.
Scale the lawn relative to the entire OLE. For preschoolers, 150-300 square feet is appropriate.
-
Location.
Try to locate a lawn as a central focus of the play and learning area, connected to primary pathways.
-
Shape.
Lay out in a naturalistic /curvy form, with edges defined by low railings or shrubs to create calm corners in the midst of active play.
-
Material.
Invest in high quality lawn turf, making sure the subsurface soil has been appropriately amended for good drainage.
-
Shade.
Install deciduous shade tree on the south side to create shady spot(s) for social activity.
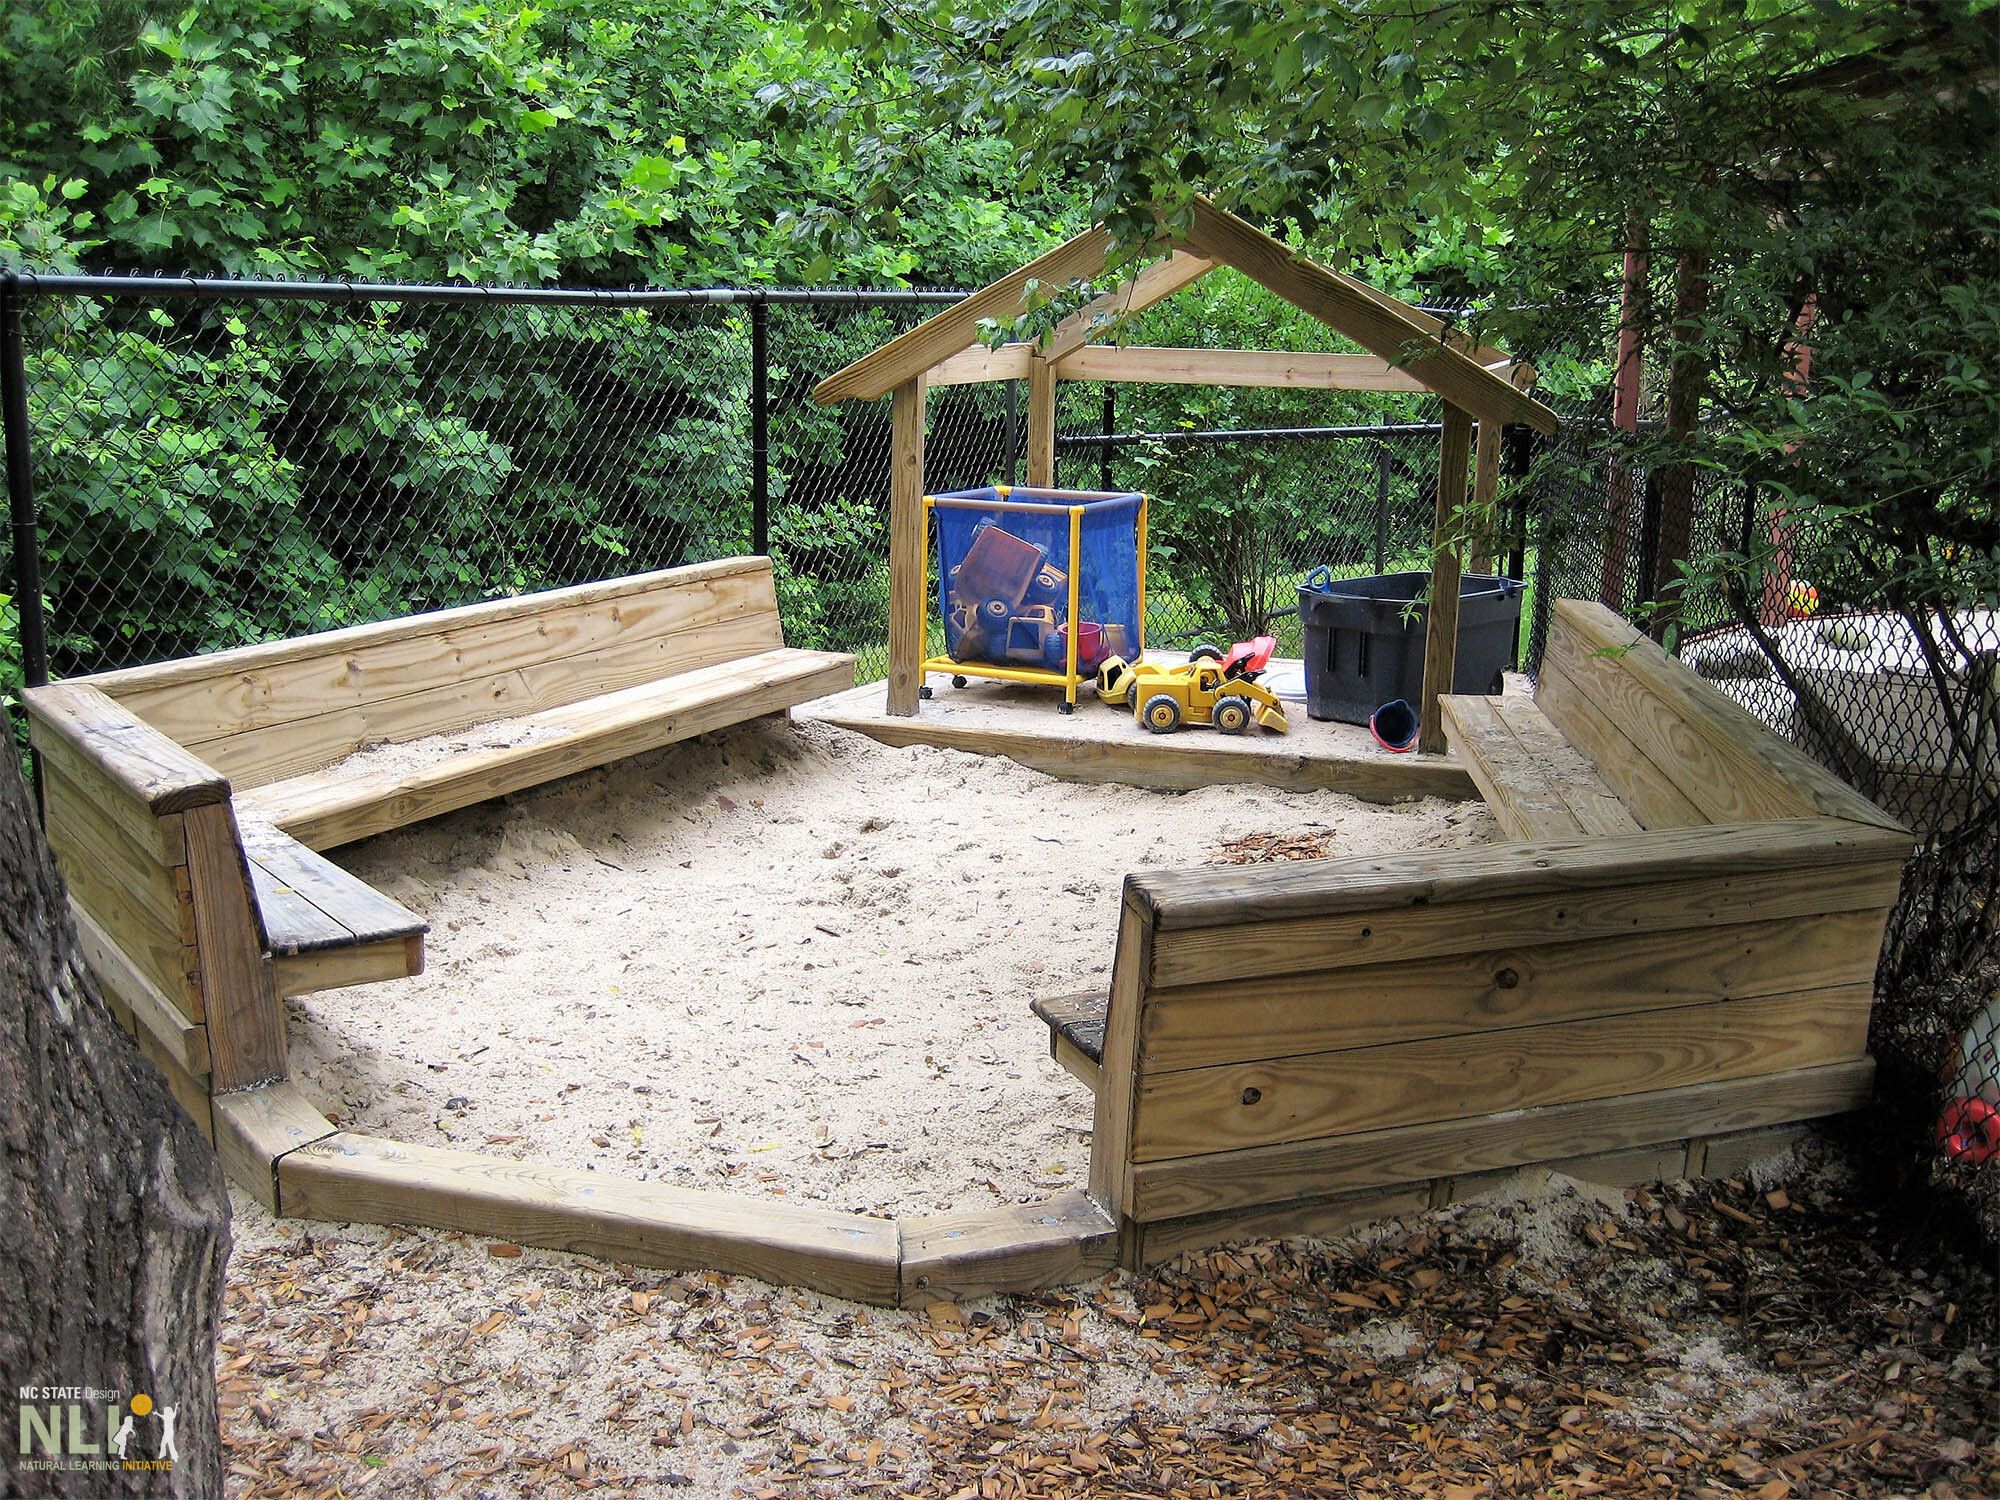
6. SAND
Sand provides opportunities to move, mold, dig, sift, sculpt, and pour. It is a classic natural material, providing a multitude of opportunities for creative play and social interaction. Key considerations include:
-
Depth of sand.
For toddlers, 12-18 inches; for preschoolers,18-24 inches.
-
Location.
Locate against a boundary fence or in a fence corner to avoid sand “migration” and away from paths to prevent slip hazards. Avoid central locations because sand will migrate in all directions.
-
Containment.
Use timber construction, logs, or large, smooth rocks with plant buffers to contain sand (Figure 8).
-
Shade.
Crucial in hot climates. Shade can be achieved with deciduous shade trees or permanent, suspended, shade cloths.
-
Entry.
Provide a single entry to avoid circulation disturbance. Consider a threshold of slatted wooden deck to shake off sand if close to pathway or indoor space.
-
Covering.
Use ½-inch to 1-inch mesh net as to protect sand from animals. Do not use a tarp — it keeps light from reaching the sand, which then becomes rancid.
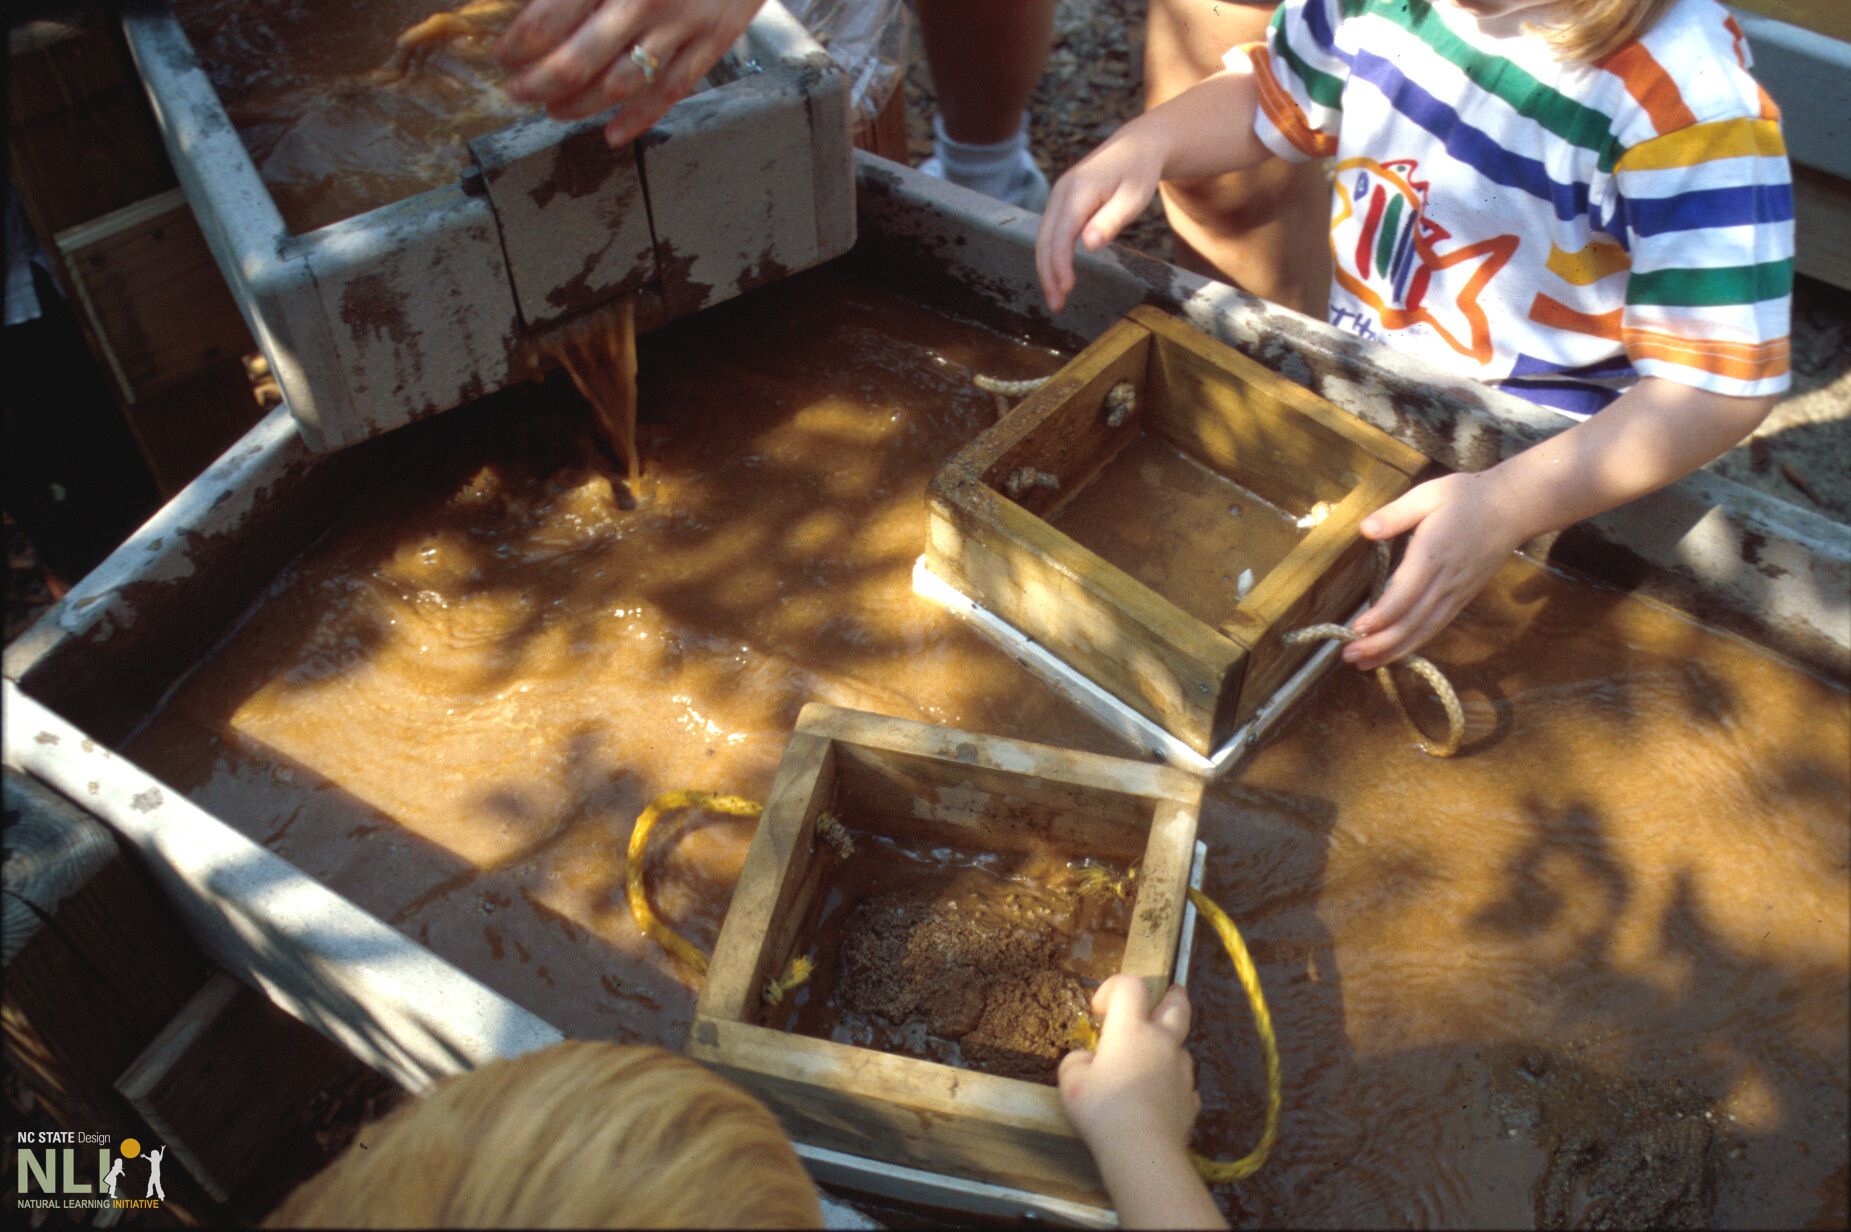
7. WATER PLAY SETTINGS
Water creates endless, multi-sensory play opportunities. Water features allow children to interact with diverse objects; floating leaves, manipulating water flow with movable stones, pouring with containers, splashing, painting with water, and more (Figure 9). The primary methods of providing water play include elevated water tables or in-ground, hard-surfaced streams. Key considerations include:
-
Supply.
Use a potable water supply that drains into either a sewer system or rain garden or flows into a dry stream bed.
-
Drainage.
Features should drain at the end of each day to avoid standing water.
-
Sanitation.
Consult local regulations that may apply to childcare center water installations.
-
Surfacing.
Surfaces around water play settings should be nonskid and well drained.
-
Height.
Elevated water tables can be located in sand play settings as an effective way of combining sand and water play (Figure 11).
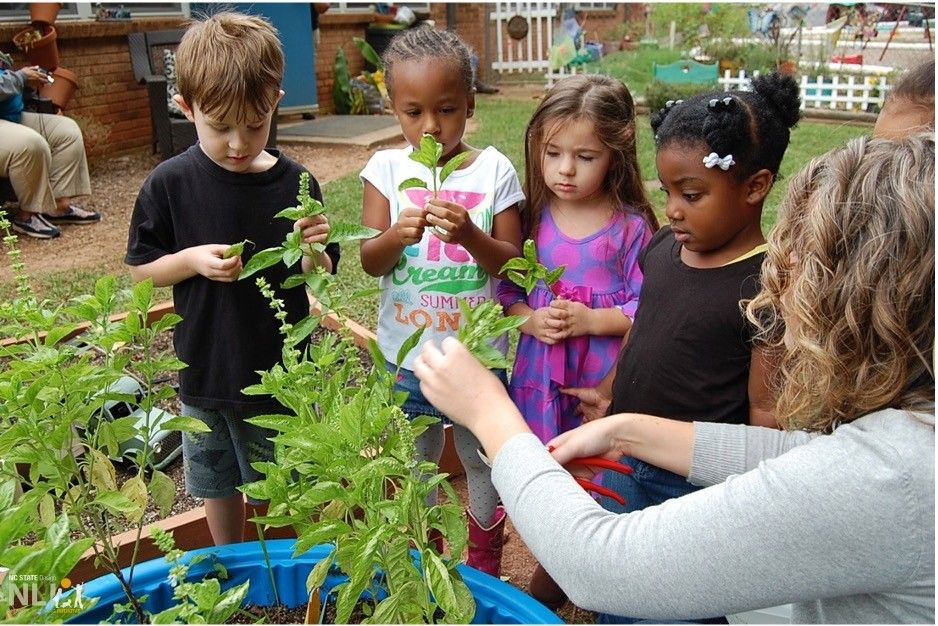
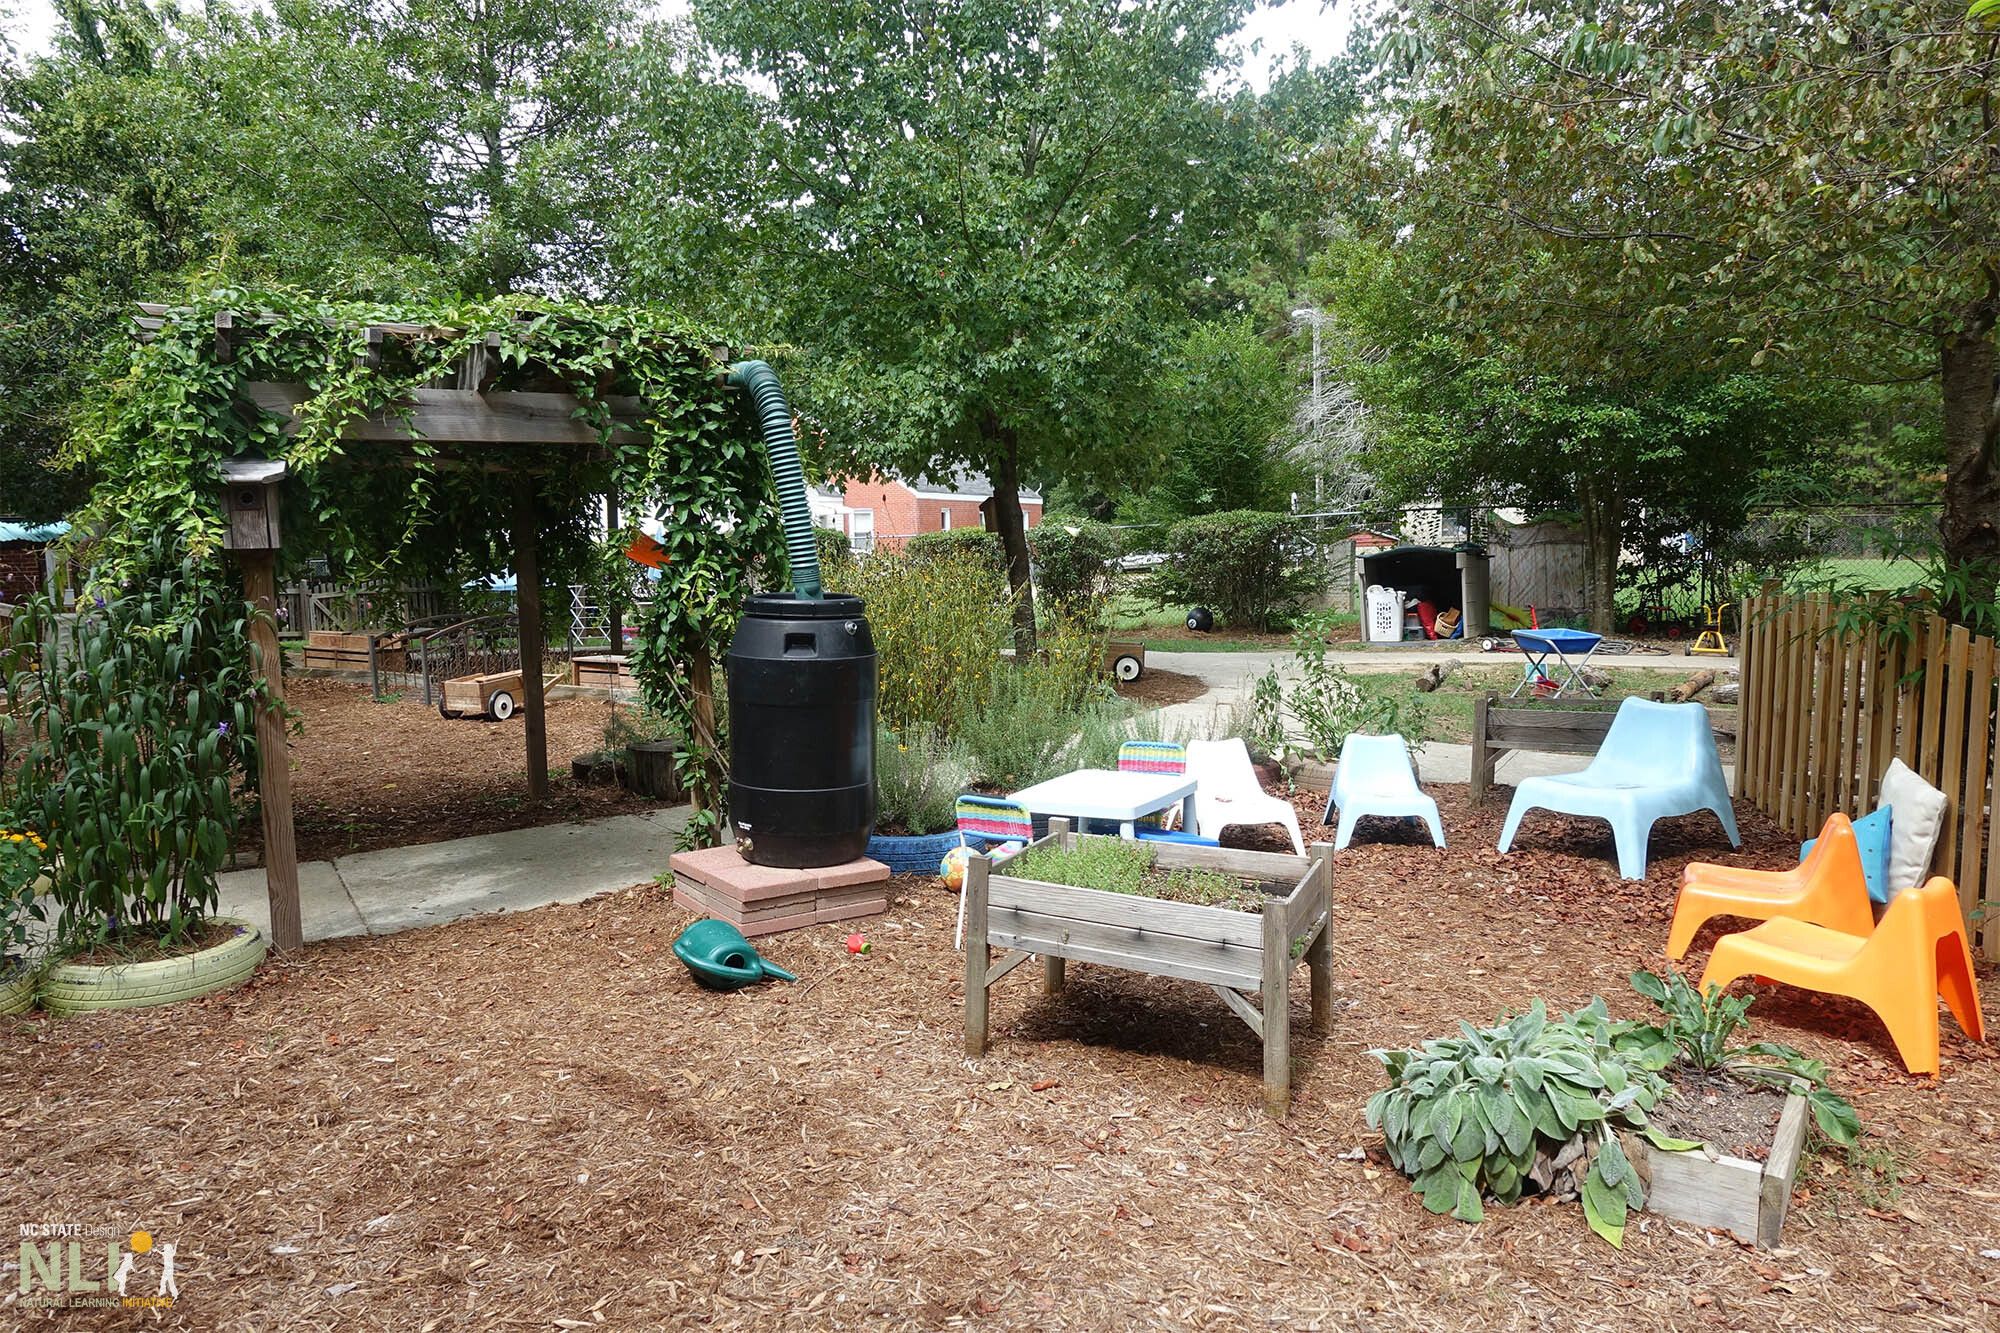
8. EDIBLE LANDSCAPES
Edible landscapes include annual vegetable gardens and permanent edible landscape elements such as perennial vegetables, fruiting trees, shrubs, and vines. Gardens can be a small, single bed or a large managed garden of 200-300 square feet. Edible landscapes get children excited about eating fresh fruit and vegetables and connect them intimately with nature. Key considerations include:
-
Types.
Garden forms include: raised beds; large, walk-in beds; tubs and other containers; window boxes; beds along fence lines supporting annual vines; and whatever you can invent!
-
Size.
Because of the limited reach of small children, beds of all types need to be narrow (24 to 36 inches for double-sided beds) and 12 to 24 inches high.
-
Location.
Sunny, south-facing, low activity area. Adjacent to storage or “potting shed.”
-
Protection.
To keep children from trampling plants, edge beds with framed timber between 6 and 18 inches high, or create informal borders with stones and logs.
-
Layout.
Define clear spatial structure with a single entrance and primary and secondary pathways laid out for convenient access to narrow beds. For a smaller garden, ensure beds are far enough apart to allow movement between them.
9. OUTDOOR CLASSROOMS
All outdoor play and learning programs need a base of operations and storage for play equipment and materials, including wheeled toys, loose parts, and garden tools. Create an outdoor classroom by adding a greenhouse, multipurpose deck, or covered porch to serve as an activity space. Key considerations include:
-
Location.
Access from primary pathway, as close as possible to settings where play and educational programs are held.
-
Access.
If contents are accessible to children, they can learn to take initiative, carry out an activity, tidy up and return items when completed.
10. SHADY PLACES
Adequate protection from the sun is essential for the health and comfort of young children outdoors. Key considerations include:
-
Vegetation.
Use medium-size trees or large shrubs interspersed within existing settings or clustered around a deck to create a shady grove. Install 2½-inch caliper trees to produce sufficient shade in a few years.
-
Structures.
Arbors, pergolas, tunnels, and trellises scattered throughout the play and learning area create patches of shade and three-dimensional space scaled to young children. Experiment with standard construction elements such as light metal grids and netting to create armatures for vine growth (Figure 14).