13. Gross Motor Logs
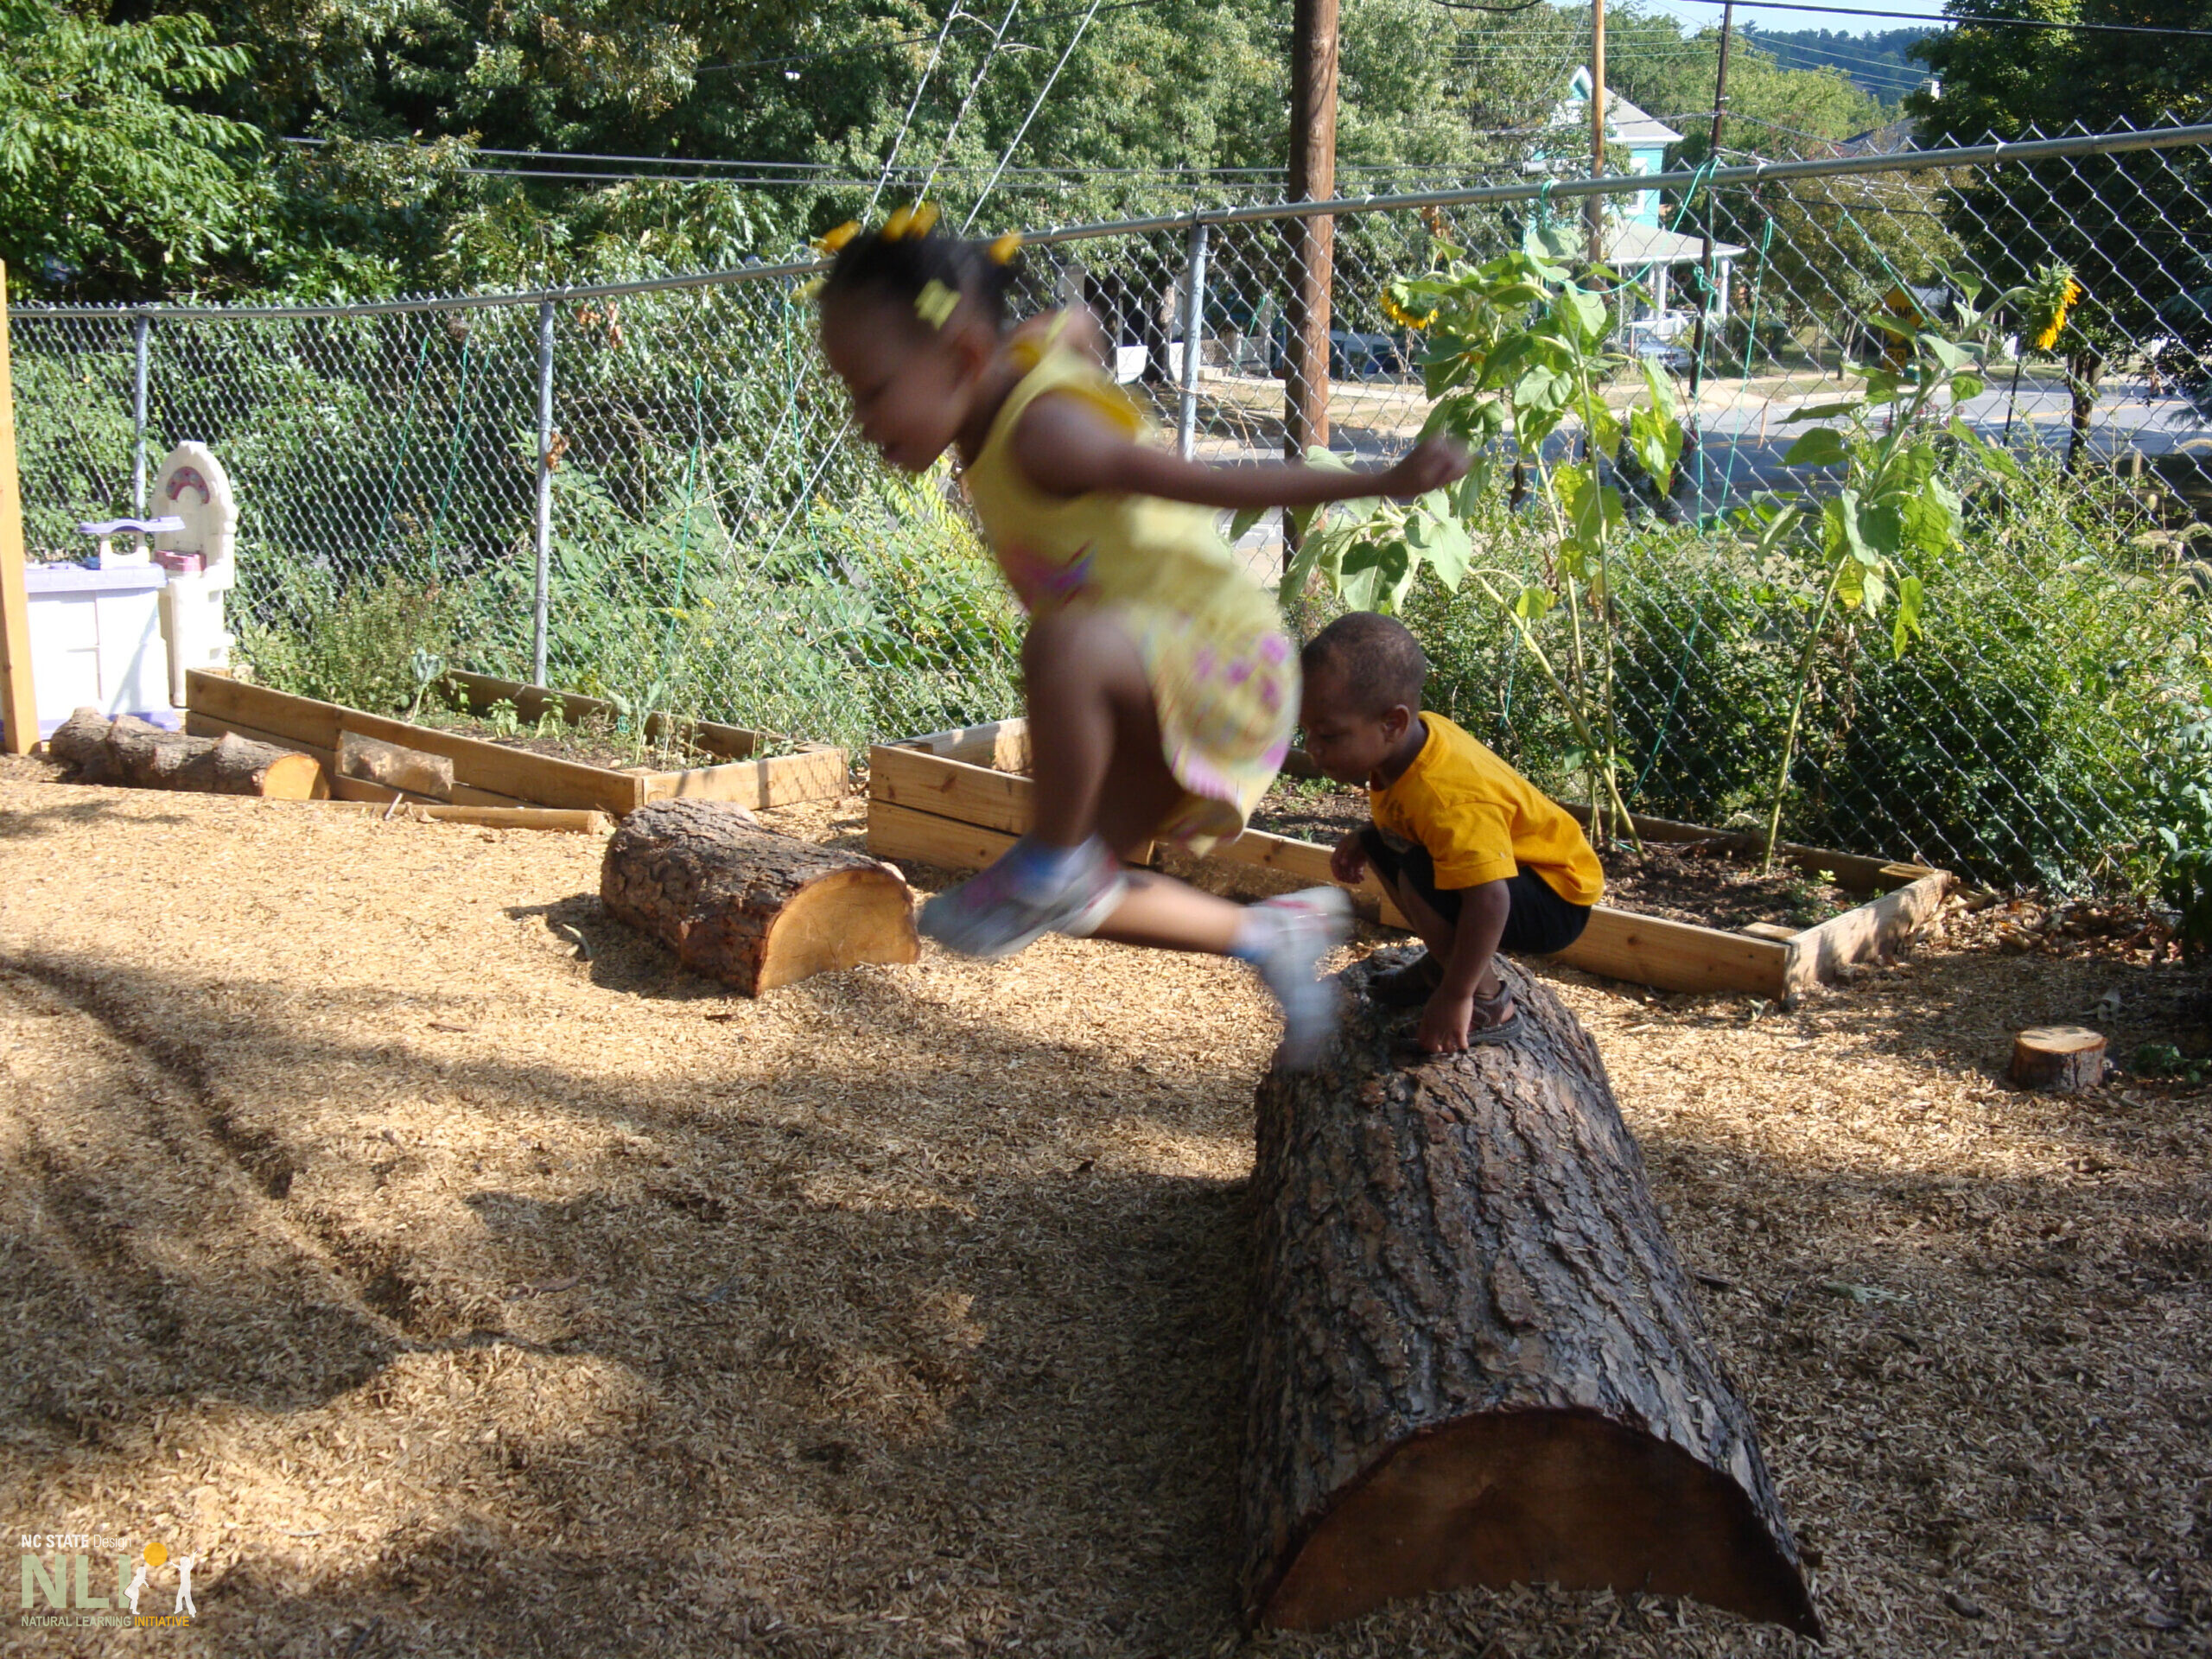
Gross motor logs may be as simple as a single, horizontal log installed on the ground or a low grouping of various sized logs and/or limbs installed to provide a natural alternative to fixed, manufactured play structures. Logs installed this way may afford balancing, climbing, scrambling, jumping, and leaping. Logs can usually be found locally for free from tree care companies. Make contact to reserve lengths of trunk or large limbs before being chipped. Installation using hand tools is an excellent volunteer activity. The shared sense of accomplishment can motivate assistance for other installation projects.
RECOMMENDED TIMBERS
Black locust (Robinia) and cedar species are the best choice because they are uniquely rot- and pest-resistant and can last many years before needing to be replaced. However, they may be challenging to source with sufficient diameter. Other hardwoods are a viable alternative, especially if protected against rot. Longevity of all hardwoods can be extended considerably when best practices described below are followed.
PREPARING LOGS
- Use seasoned logs (at least 12 months since felling). Logs harvested from dead trees may be used but seek advice from a certified arborist.
- Use logs 8 in. or larger in diameter. Useful lengths with smaller diameters start at 24 in. Larger diameter lengths may be limited by ability to move heavy logs.
- Logs with sturdy branches attached and/or multi-branched limbs should be carefully considered as potentially stable stand-alone log structures or offering the possibility to be combined to add play value.
- Debark logs (easier with seasoned timber) using a curved draw knife. Ensure child safety by using a disc-sander to create smooth surfaces, including rounding crosscut edges and exposed ends.
- NOTE: Bark on horizontal logs not in contact with the ground may be left on. Bark will dry out and may attract insect life underneath, which can be an interesting learning experience for children to observe. Eventually, bark will fall off to become playful loose parts until fragmenting into smaller and smaller pieces, eventually decomposing into the ground surface.
- Remove branch stubs, sharp protrusions, and sand smooth.
- Protect debarked logs from rot by using waterborne copper naphthenate (nontoxic). Apply several coats, leaving to dry between applications (about 1 hour). Apply coats until no more liquid is absorbed. Attend especially to surfaces that may be in contact with the ground or buried below grade. Further protect logs annually with Thompson’s WaterSeal.
- Treat exposed ends with two coats of polyurethane varnish. DO NOT varnish upper ends of vertical logs used by children, as they may become slippery and hazardous when wet.
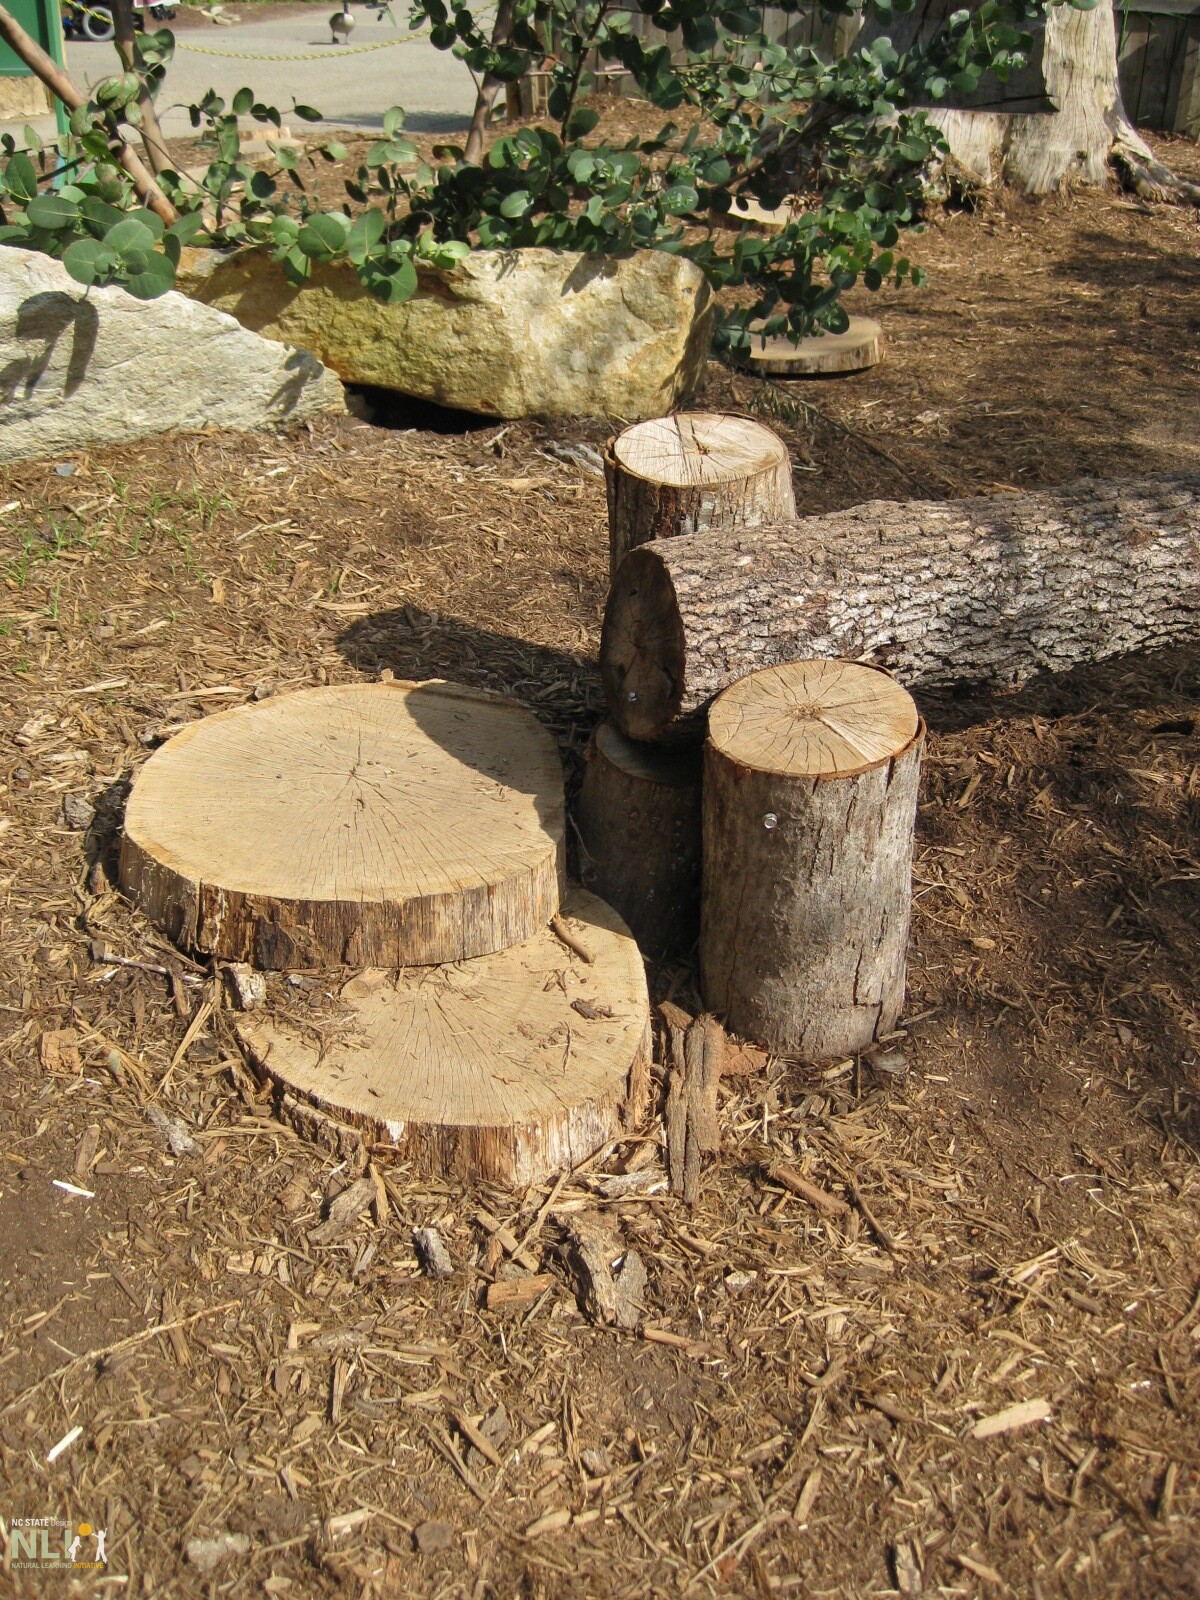
- Logs of sufficient diameter and straightness may be sawn in half lengthwise and laid flat side down to increase stability, preferably supported by a flat stone at each end to avoid contact with the ground. Installed flat side up, logs afford toddlers a more appropriate “beginners” experience.
INSTALLING HORIZONTAL LOGS
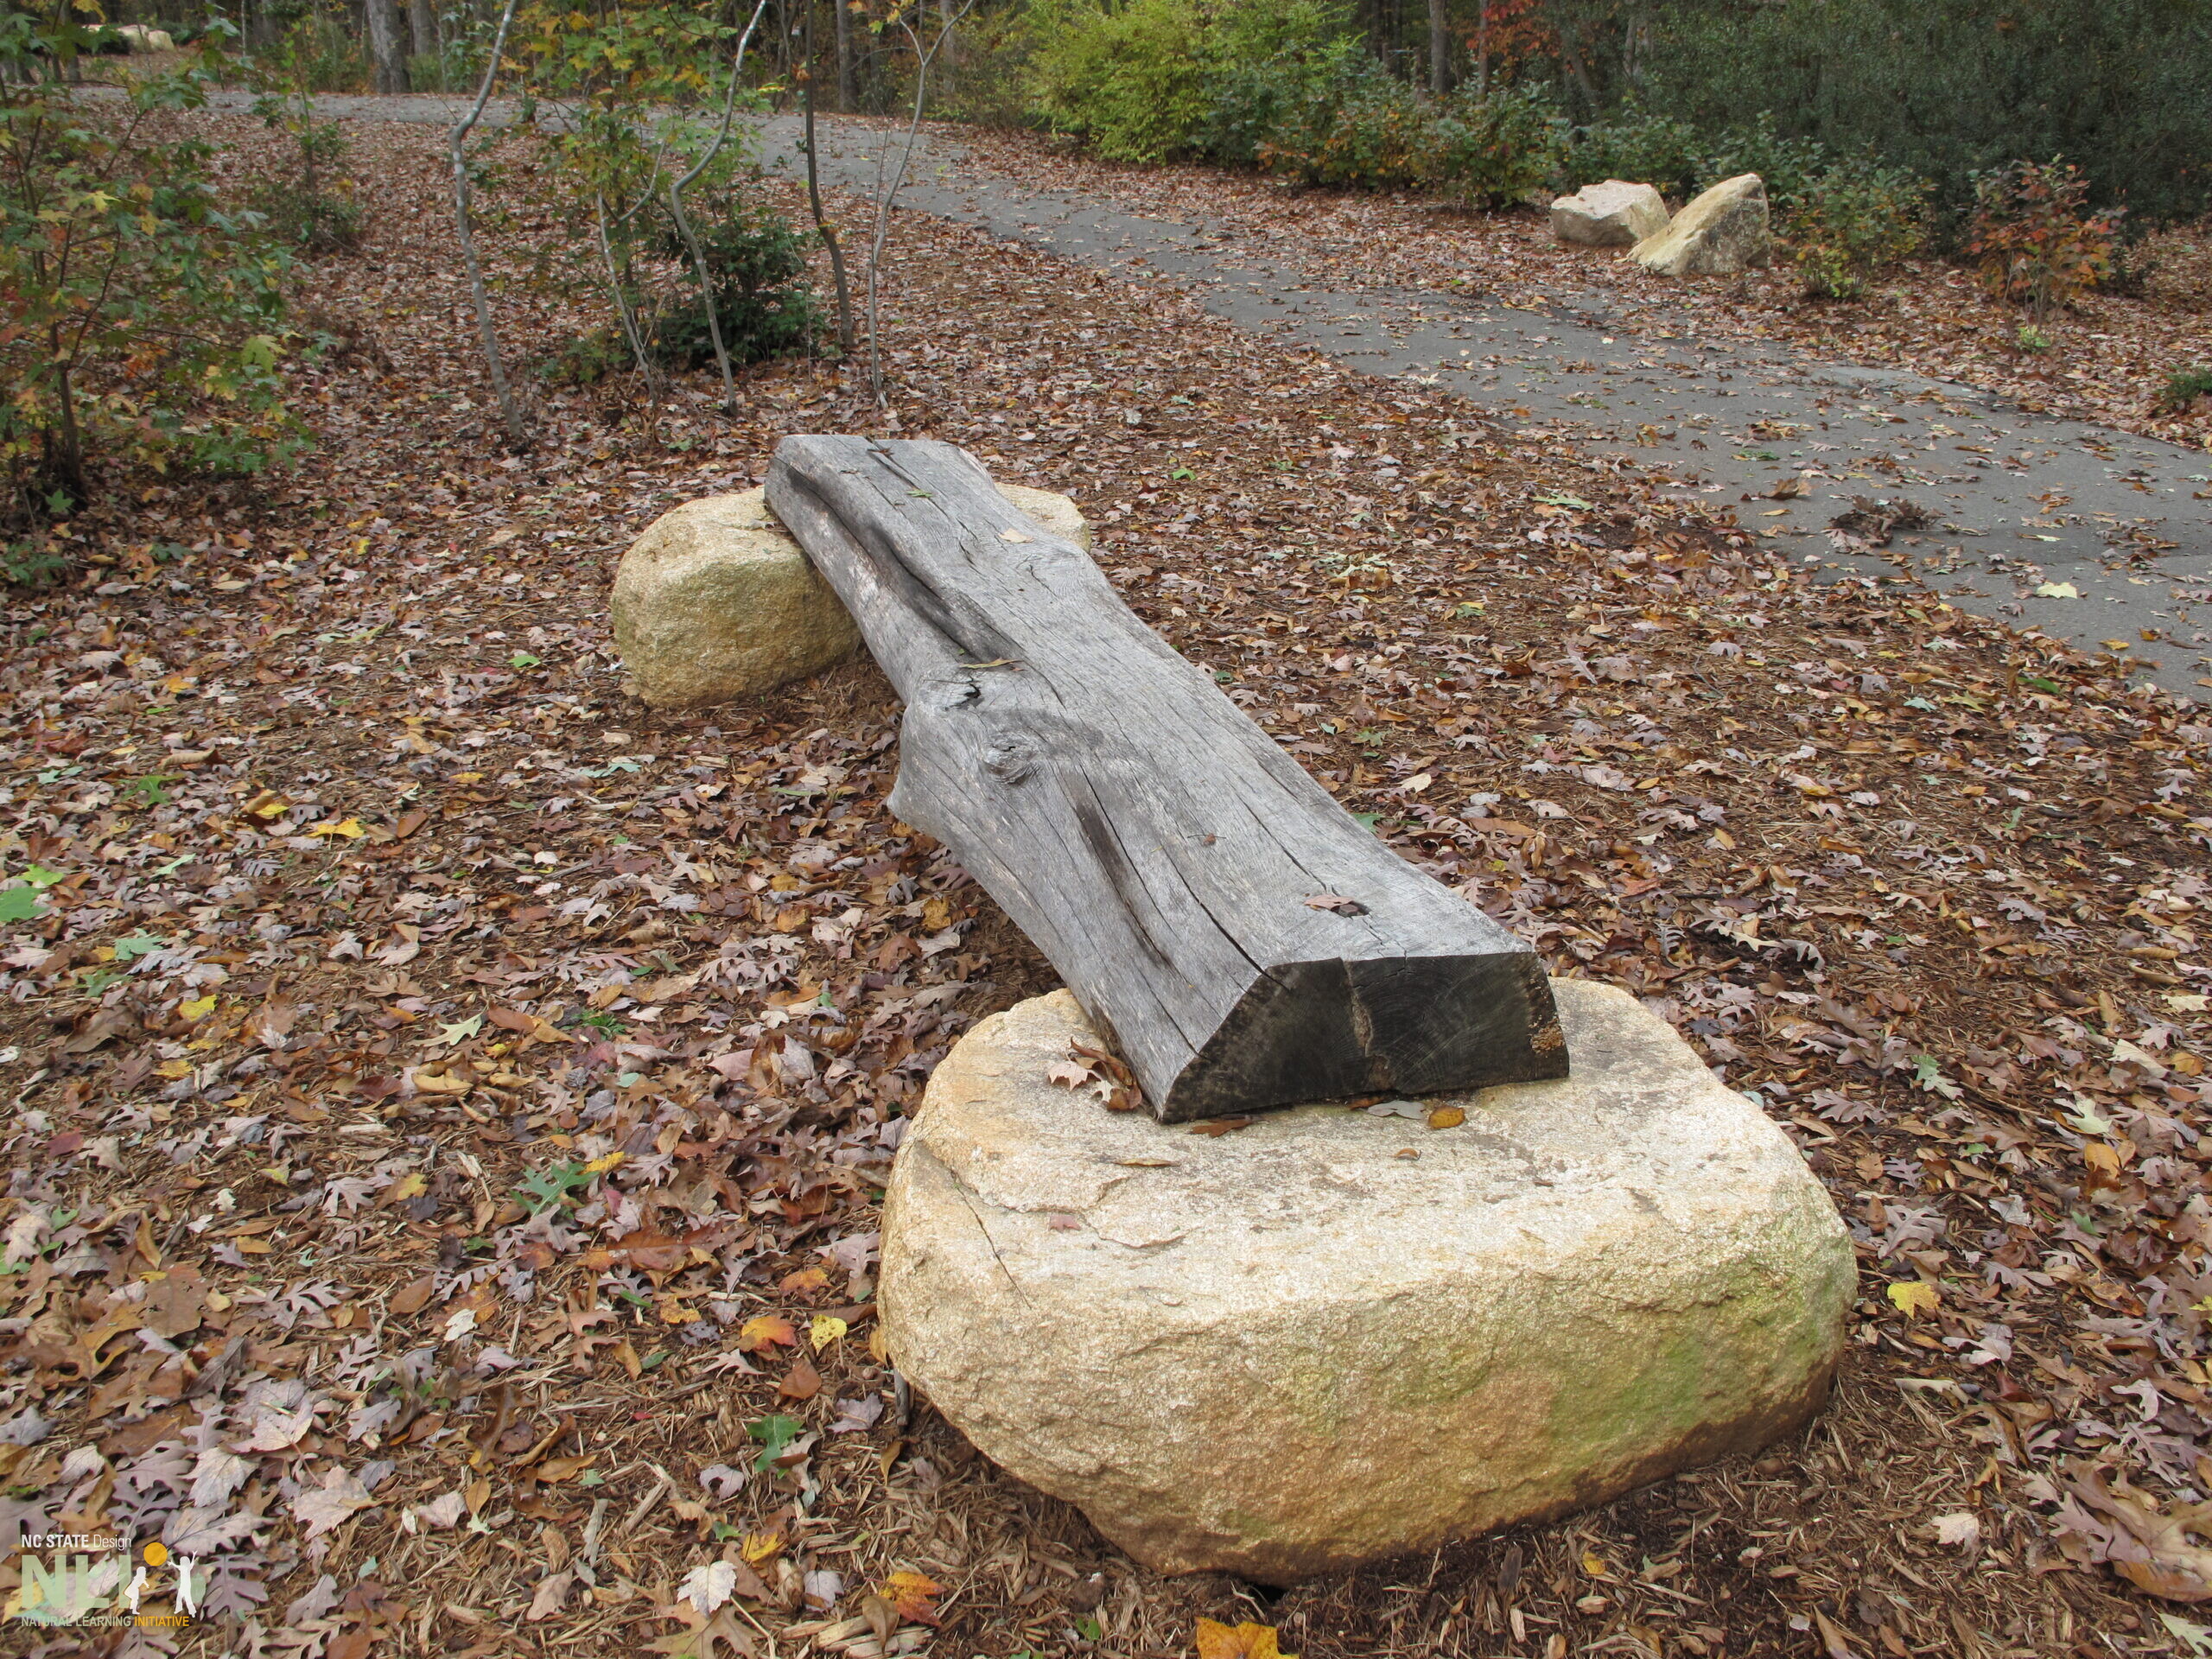
Small horizontal logs (8-18 inches diameter). Install vertical logs at each end for structural support and fasten with log screws of appropriate length. A series of logs thus arranged can offer a continuous, gross motor circuit and/or be combined with a stand-alone circuit of vertical logs (described below).
Large horizontal logs (18 inches or greater diameter). Dig a shallow, rounded-bottom trench and install the log up to 1/3 of its diameter on a 2-inch bed of pea gravel (separating log from ground). Pack gravel back around the log. Log will remain stable under its own weight. If the upper surface is more than 18 inches above ground, some state licensing rules may require a standard, 6-foot use zone.
INSTALLING VERTICAL LOGS
Vertical logs may be installed to support horizontal logs (as described above) or as stand-alone additional components. In either case follow the steps below.
- Dig log holes. Make holes 4 in. wider than the log diameter (to allow for 2 in. side lining of gravel). Make hole depth approximately 1/3 of the log height above ground, plus 2 in. (to allow for bottom lining of gravel). Measurements may be adjusted according to soil conditions. Undisturbed, heavy clay soils require less depth. Light sandy/loam or disturbed soils may need more depth. Ensure log will be no more than 18 in. above the ground when set in place (otherwise, a standard use zone may be required. Distribute excess soil elsewhere on the site.
- Add drainage. Fill the bottom of the hole with approximately 2 in. of pea gravel, adjusting to the required height of the log above ground. Tamp the gravel.¹
- Place treated log upright in center of hole. Gradually fill the 2 in. gap around the log with pea gravel, tamping continuously² until gravel is flush with the surrounding ground.
- For a stand-alone log circuit, place logs 1.5 ft. apart (safe stepping distance) in a circular or semi-circular shape to fit the space. Allow for circulation also around the outer edge of the setting. Consider placing an extra-large log in the circle, or facing a semicircle, as the teacher’s designated seat for circle/story-time.
- Plant shade trees and shrubs around the gross motor setting to add shade, multi-sensory interest, and a sense of enclosure.
RECOMMENDED PLANTS
- Before digging, call 811 ahead of time to check for underground utilities. The service is free but can take several days.
- Wear sturdy boots and gloves during installation.
- Regularly inspect logs for signs of decay. If unstable, replace before they become a possible hazard.
¹ To tamp the bottom, use a regular 8”x8” steel-headed tamper.
² To tamp the sides, use a length of capped steel pipe.
MATERIALS & TOOLS:
- Black locust (Robinia) and cedar species logs (recommended)
- Other hardwood logs and limbs (acceptable)
- Log screws
- Shovel
- Eight-inch square tamper
- Capped steel pipe tamper
- Power drill
- Power disc-sander
- Pea gravel
- Flat stone supports (optional)

Partially buried log offers a young preschooler a balancing challenge.
Horizontal log supported above ground by vertical logs.
Sawn horizontal log supported by flat stones.

Large multi-branched oak limbs (downed by a hurricane) provide a unique archway entry and climber made from two limbs screwed together. Photographed 10 years after installation.