The Green Desk
Planning and Planting
Guide to Developing a Planting Plan and Purchase List
This article explains how to develop a detailed planting plan and plant purchase list from a schematic design. NLI provides schematic designs that do not indicate exact quantities, species, or spacing of plant material.
There are 3 simple steps to developing a planting plan from a schematic design:
- Select plant species.
- Draw a scaled plan showing each plant.
- Create a list of plants including plant names, quantities, and container sizes.
How to draw a scaled planting plan
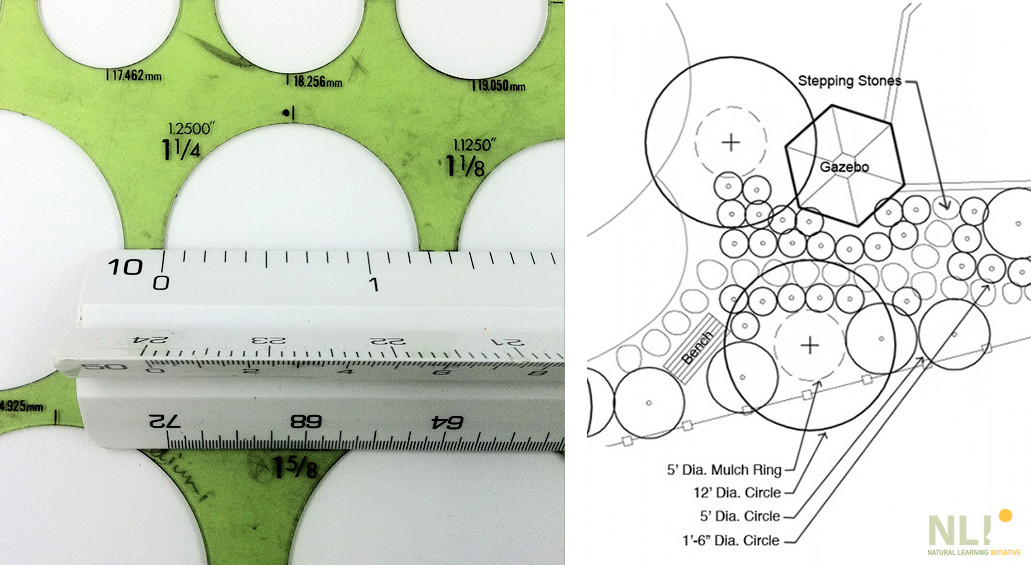
Begin by printing your schematic design to a known scale. Using an engineer’s scale, find the side that has the number 10 on it (assuming your design is at 1″=10′). Each tick mark represents one foot in real life. Now that you have the plan and scale you will need a circle template with large and small circles. Use the scale to find circles that represent the mature size of the plants you have selected. Draw circles to represent each plant. Do not overlap circles and draw them in staggered rows (see examples below). To fill in a large area with small plants start by outlining the edge and then fill in the area using the staggered row pattern. Once you have filled in all of the planting regions in the schematic design you will need to count each circle to determine the quantity of plants needed. Use different colored highlighters to check plants that have been counted so that you do not miss anything.